How to Add a Cookie Policy to Wix
Last updated on February 12, 2026
This guide will walk you through how you can generate and add a cookie policy page on your Wix website. A cookie policy is a document that provides detailed disclosure about the types of cookies used on a website and their purposes. It will help your website comply with privacy laws like the GDPR and ePrivacy Directive.
To begin with, Sign up on CookieYes and try it for free.
After you sign up, you will be directed to the installation screens. You can install the cookie banner to get GDPR compliant for your use of cookies. If you want to create a cookie policy first, then skip the installation and proceed to the app dashboard.However, the CookieYes script must still be installed on your website to display the detected cookie list and related details on the cookie policy page.
How to generate a cookie policy for a Wix website
You can access the Cookie Policy Generator in two ways:
Both methods use the same Cookie Policy Generator flow.
Method 1: Access the Cookie Policy Generator from the CookieYes app inside Wix
- Log in to your Wix dashboard.
- From the left sidebar, go to Apps and select CookieYes GDPR Cookie Banner.
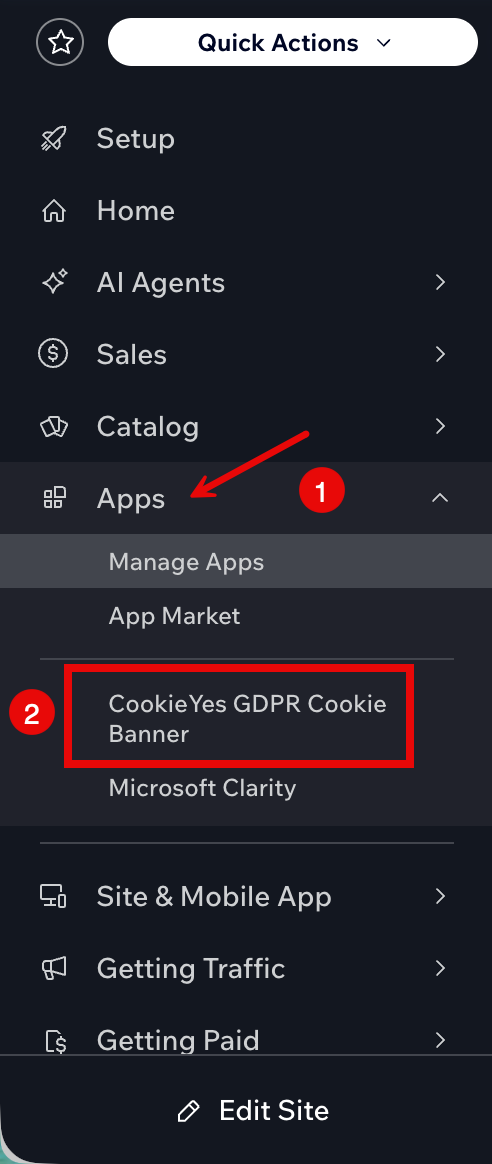
- In the CookieYes dashboard, click More in the top navigation bar and select Cookie Policy Generator.
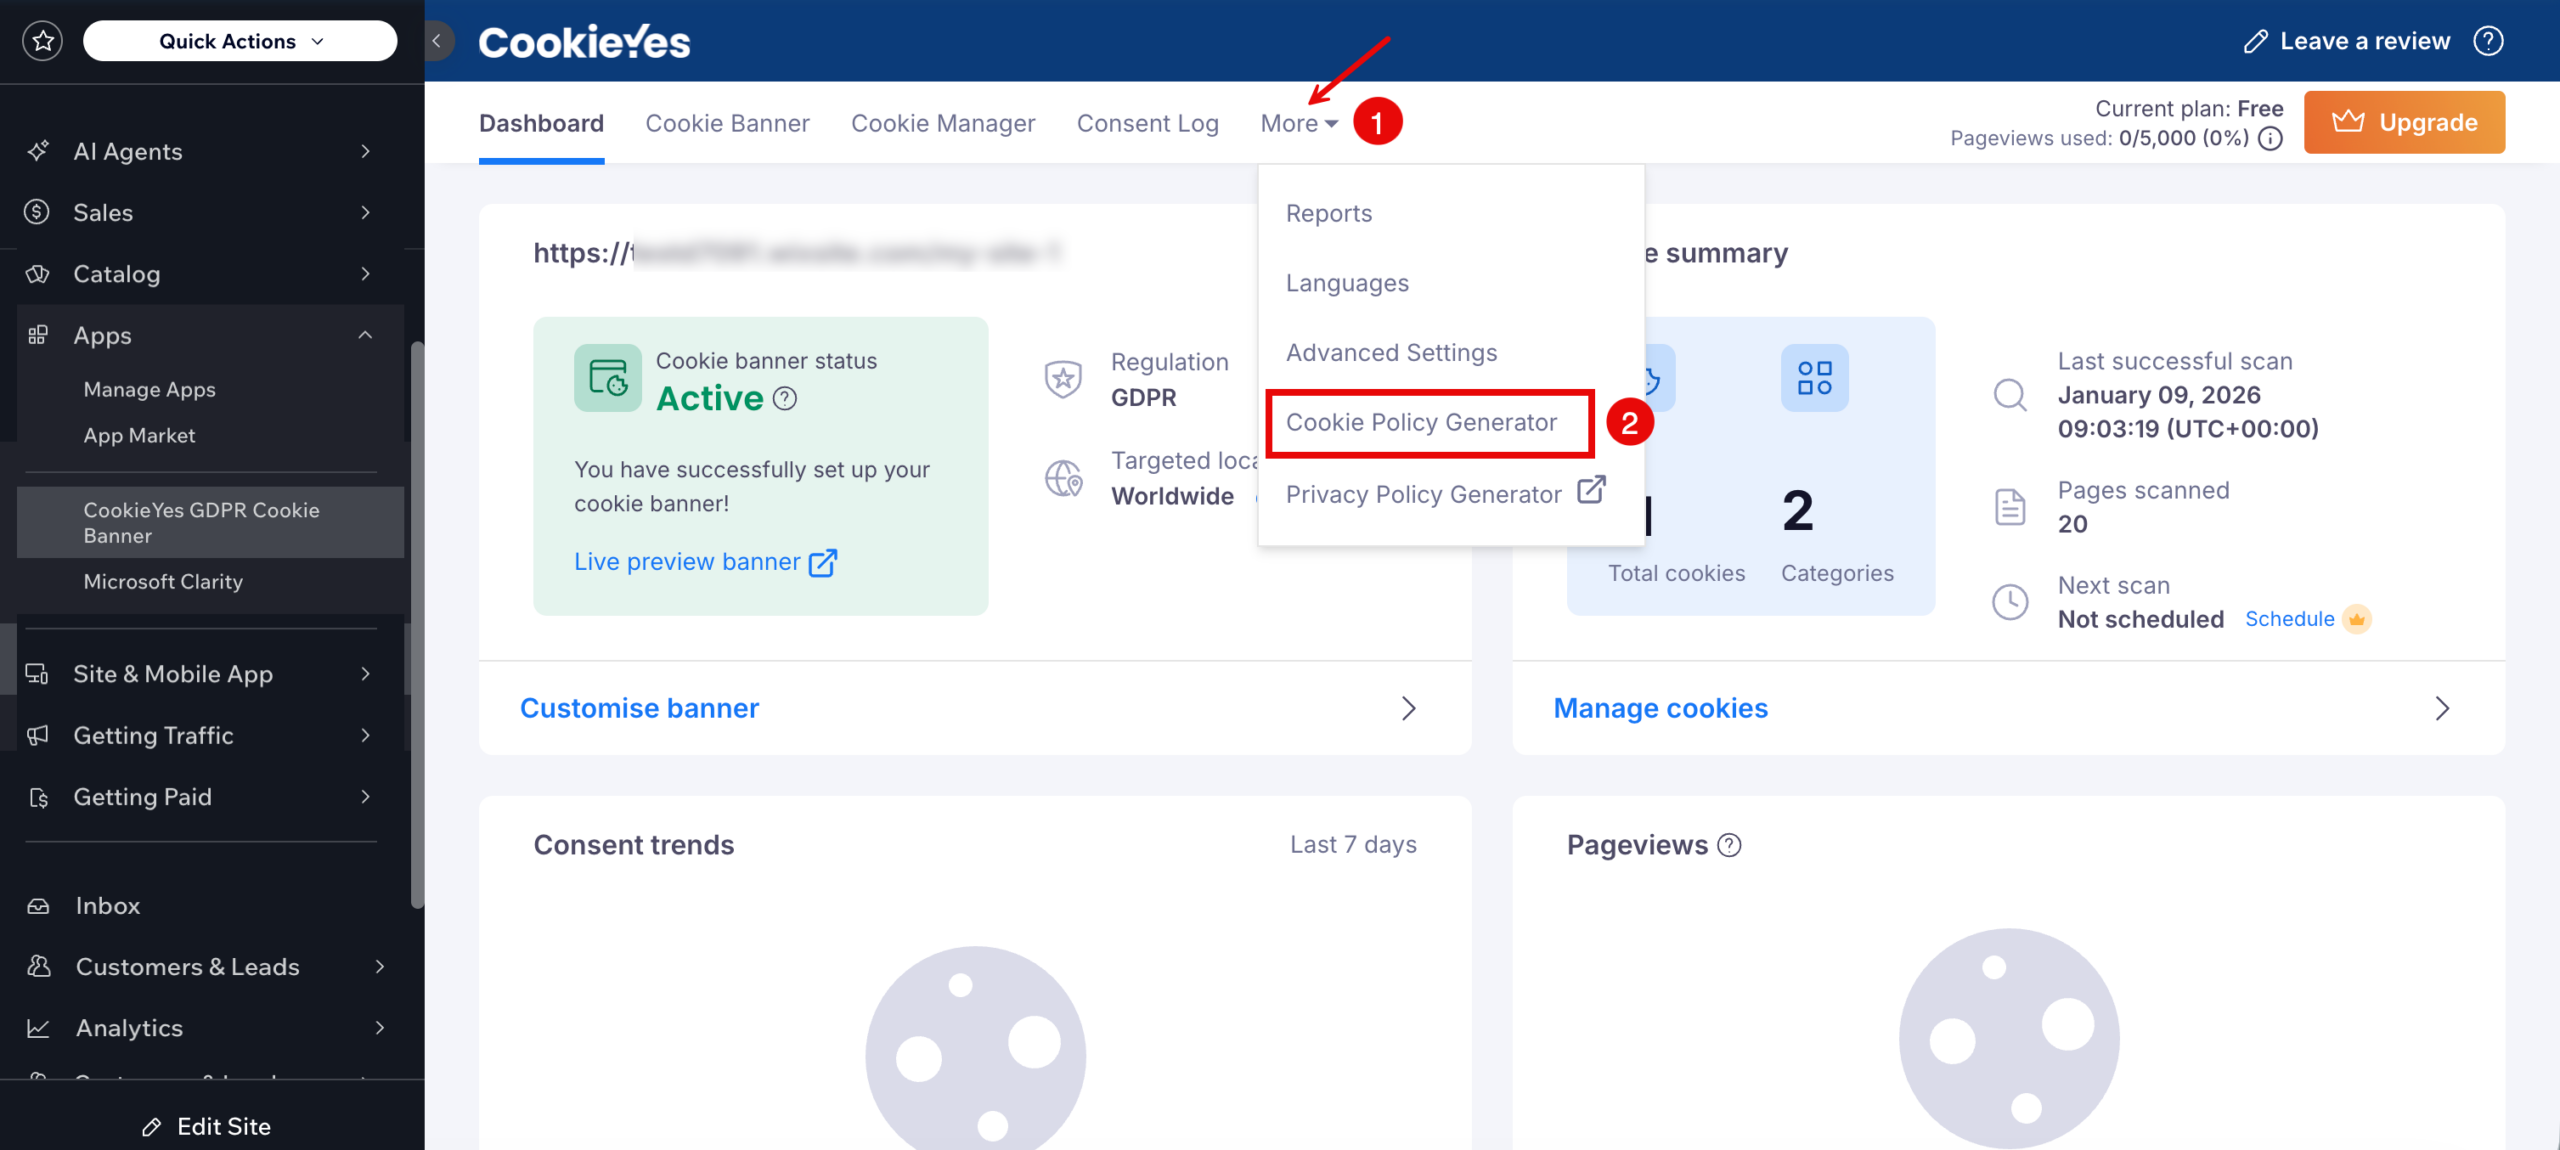
You’ll be redirected to the Cookie Policy Generator for your Wix website.
Method 2: Access the Cookie Policy Generator from the CookieYes web app
- Log in to your CookieYes account.
- From the top navigation menu, click More and select Cookie Policy Generator.
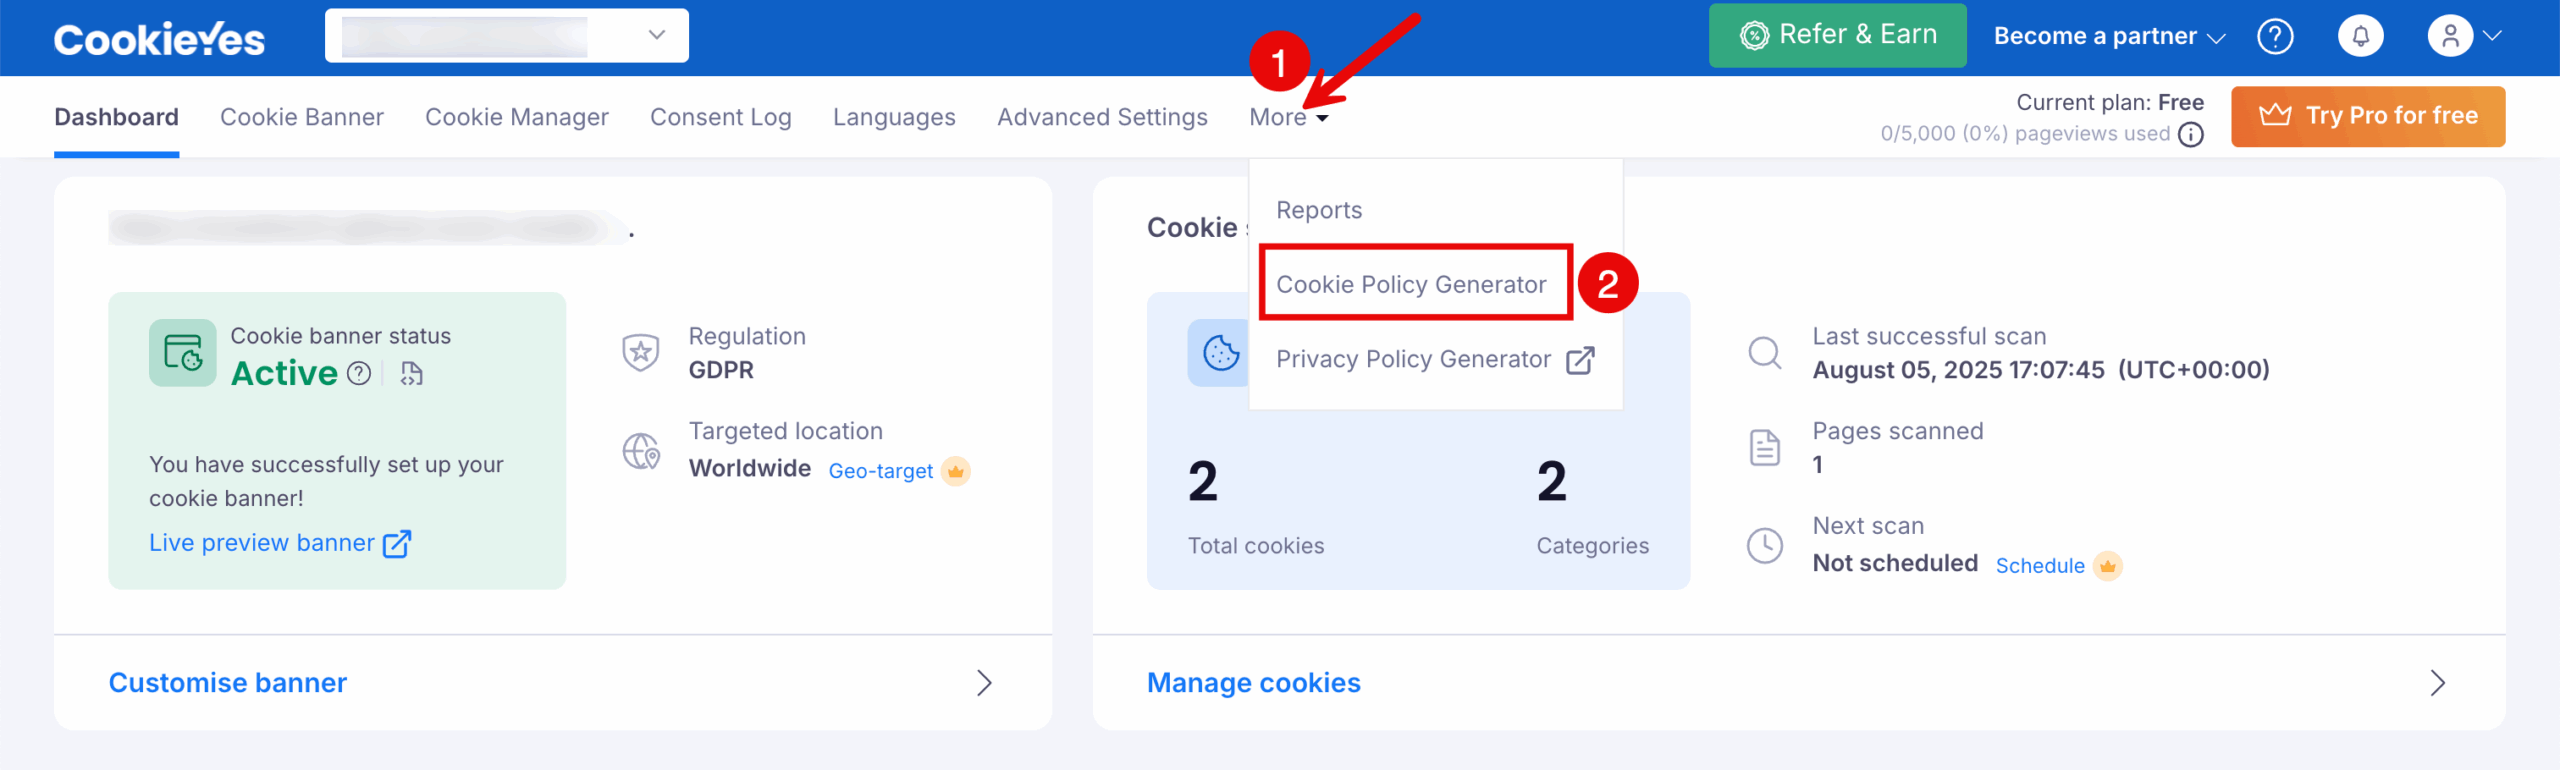
You’ll be redirected to the Cookie Policy Generator.
Generate and publish your cookie policy
Follow the steps below to generate, review, and add your cookie policy to your Wix website.
Step 1: Choose language settings
Select the Primary Language
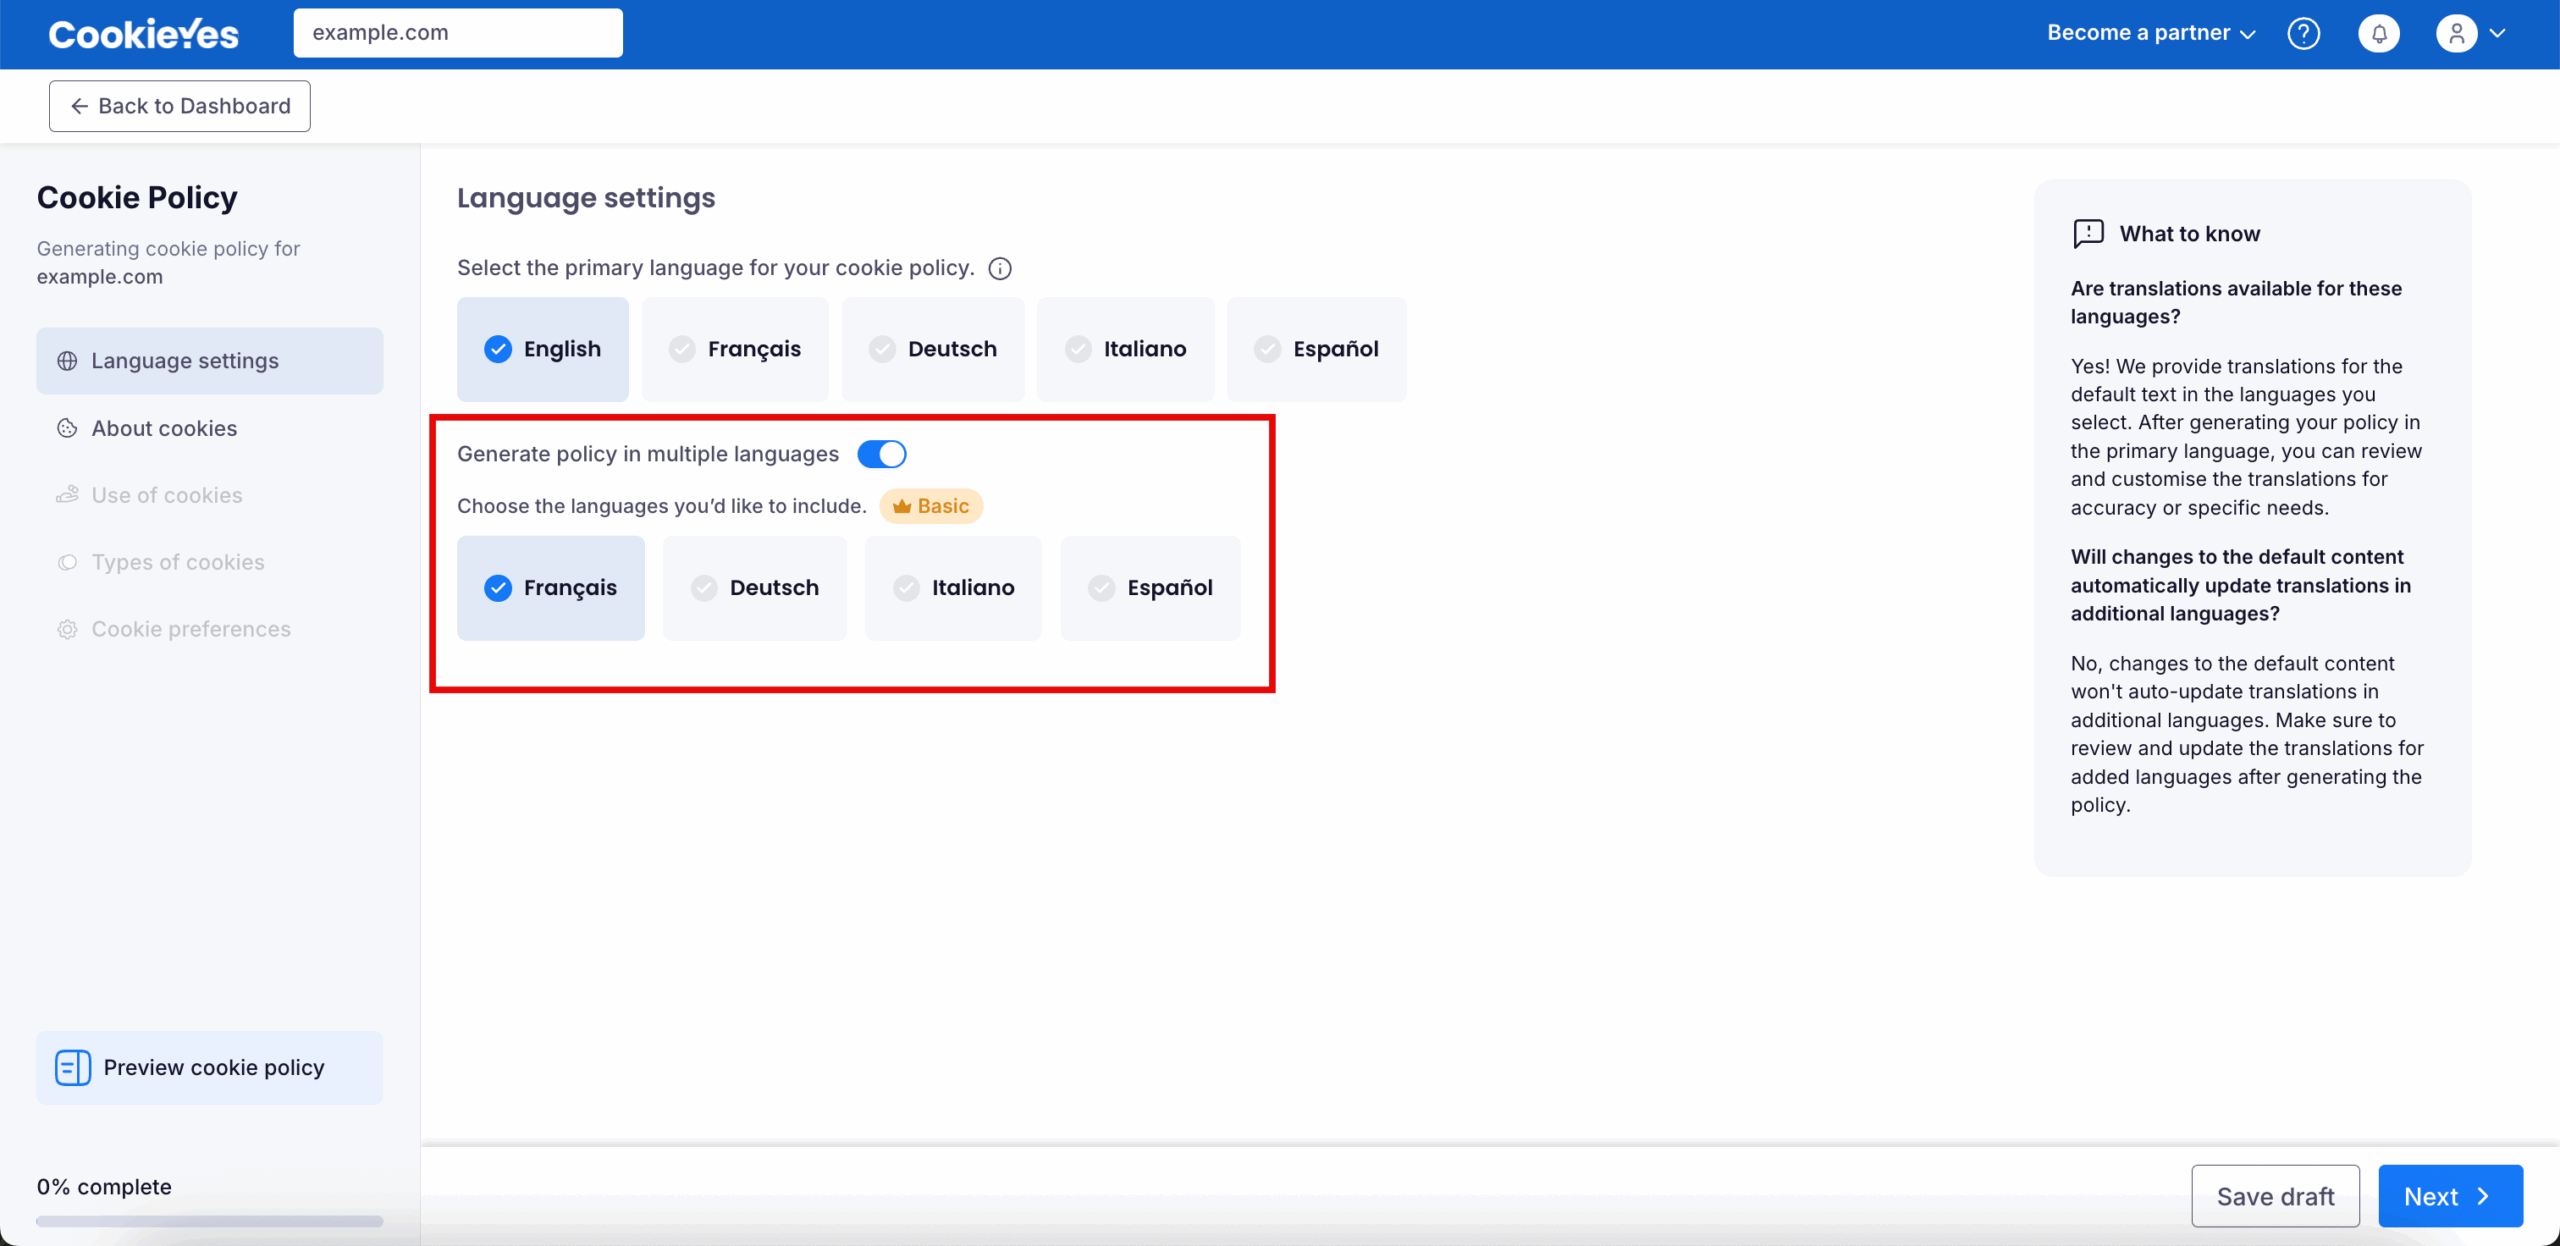
Choose your preferred primary language for the cookie policy by clicking one of the available options. The selected language will be highlighted with a checkmark.
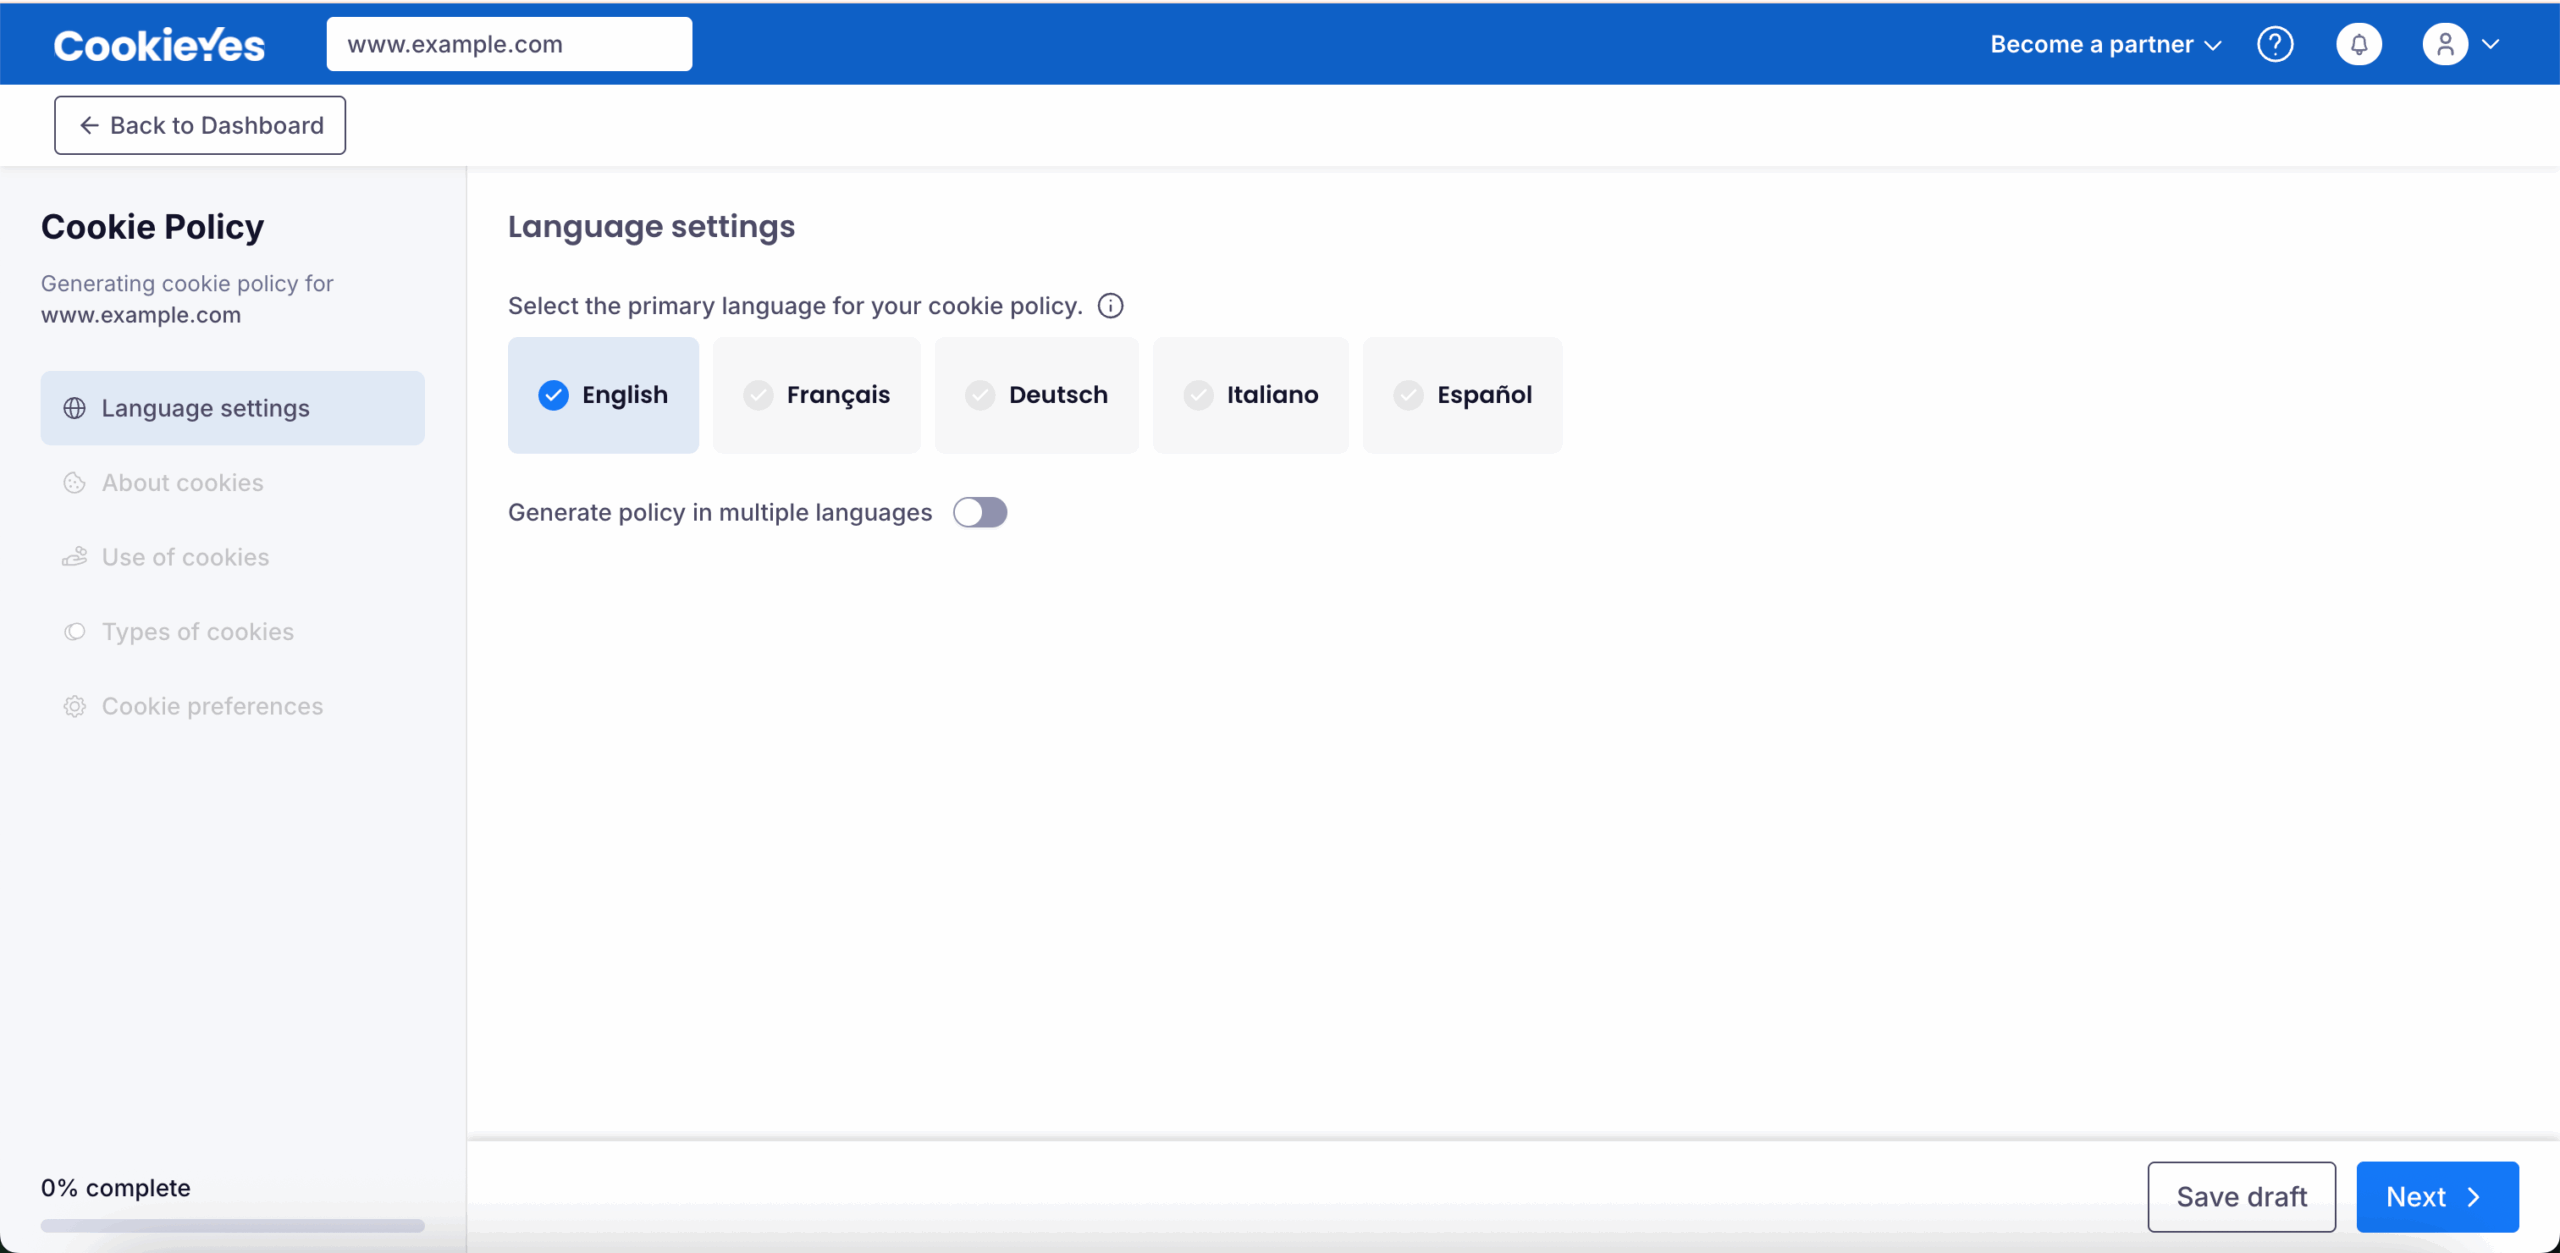
Select a language that matches the main content of your website for consistency and a better user experience.
Enable Multiple Languages (Optional)
Toggle on the Generate policy in multiple languages option. Once enabled, additional language options will appear. Select one or more additional languages from the list.
You can select multiple languages, but you’ll need to upgrade your plan before generating the policy. This feature is available only for Basic, Pro, and Ultimate subscription plans.
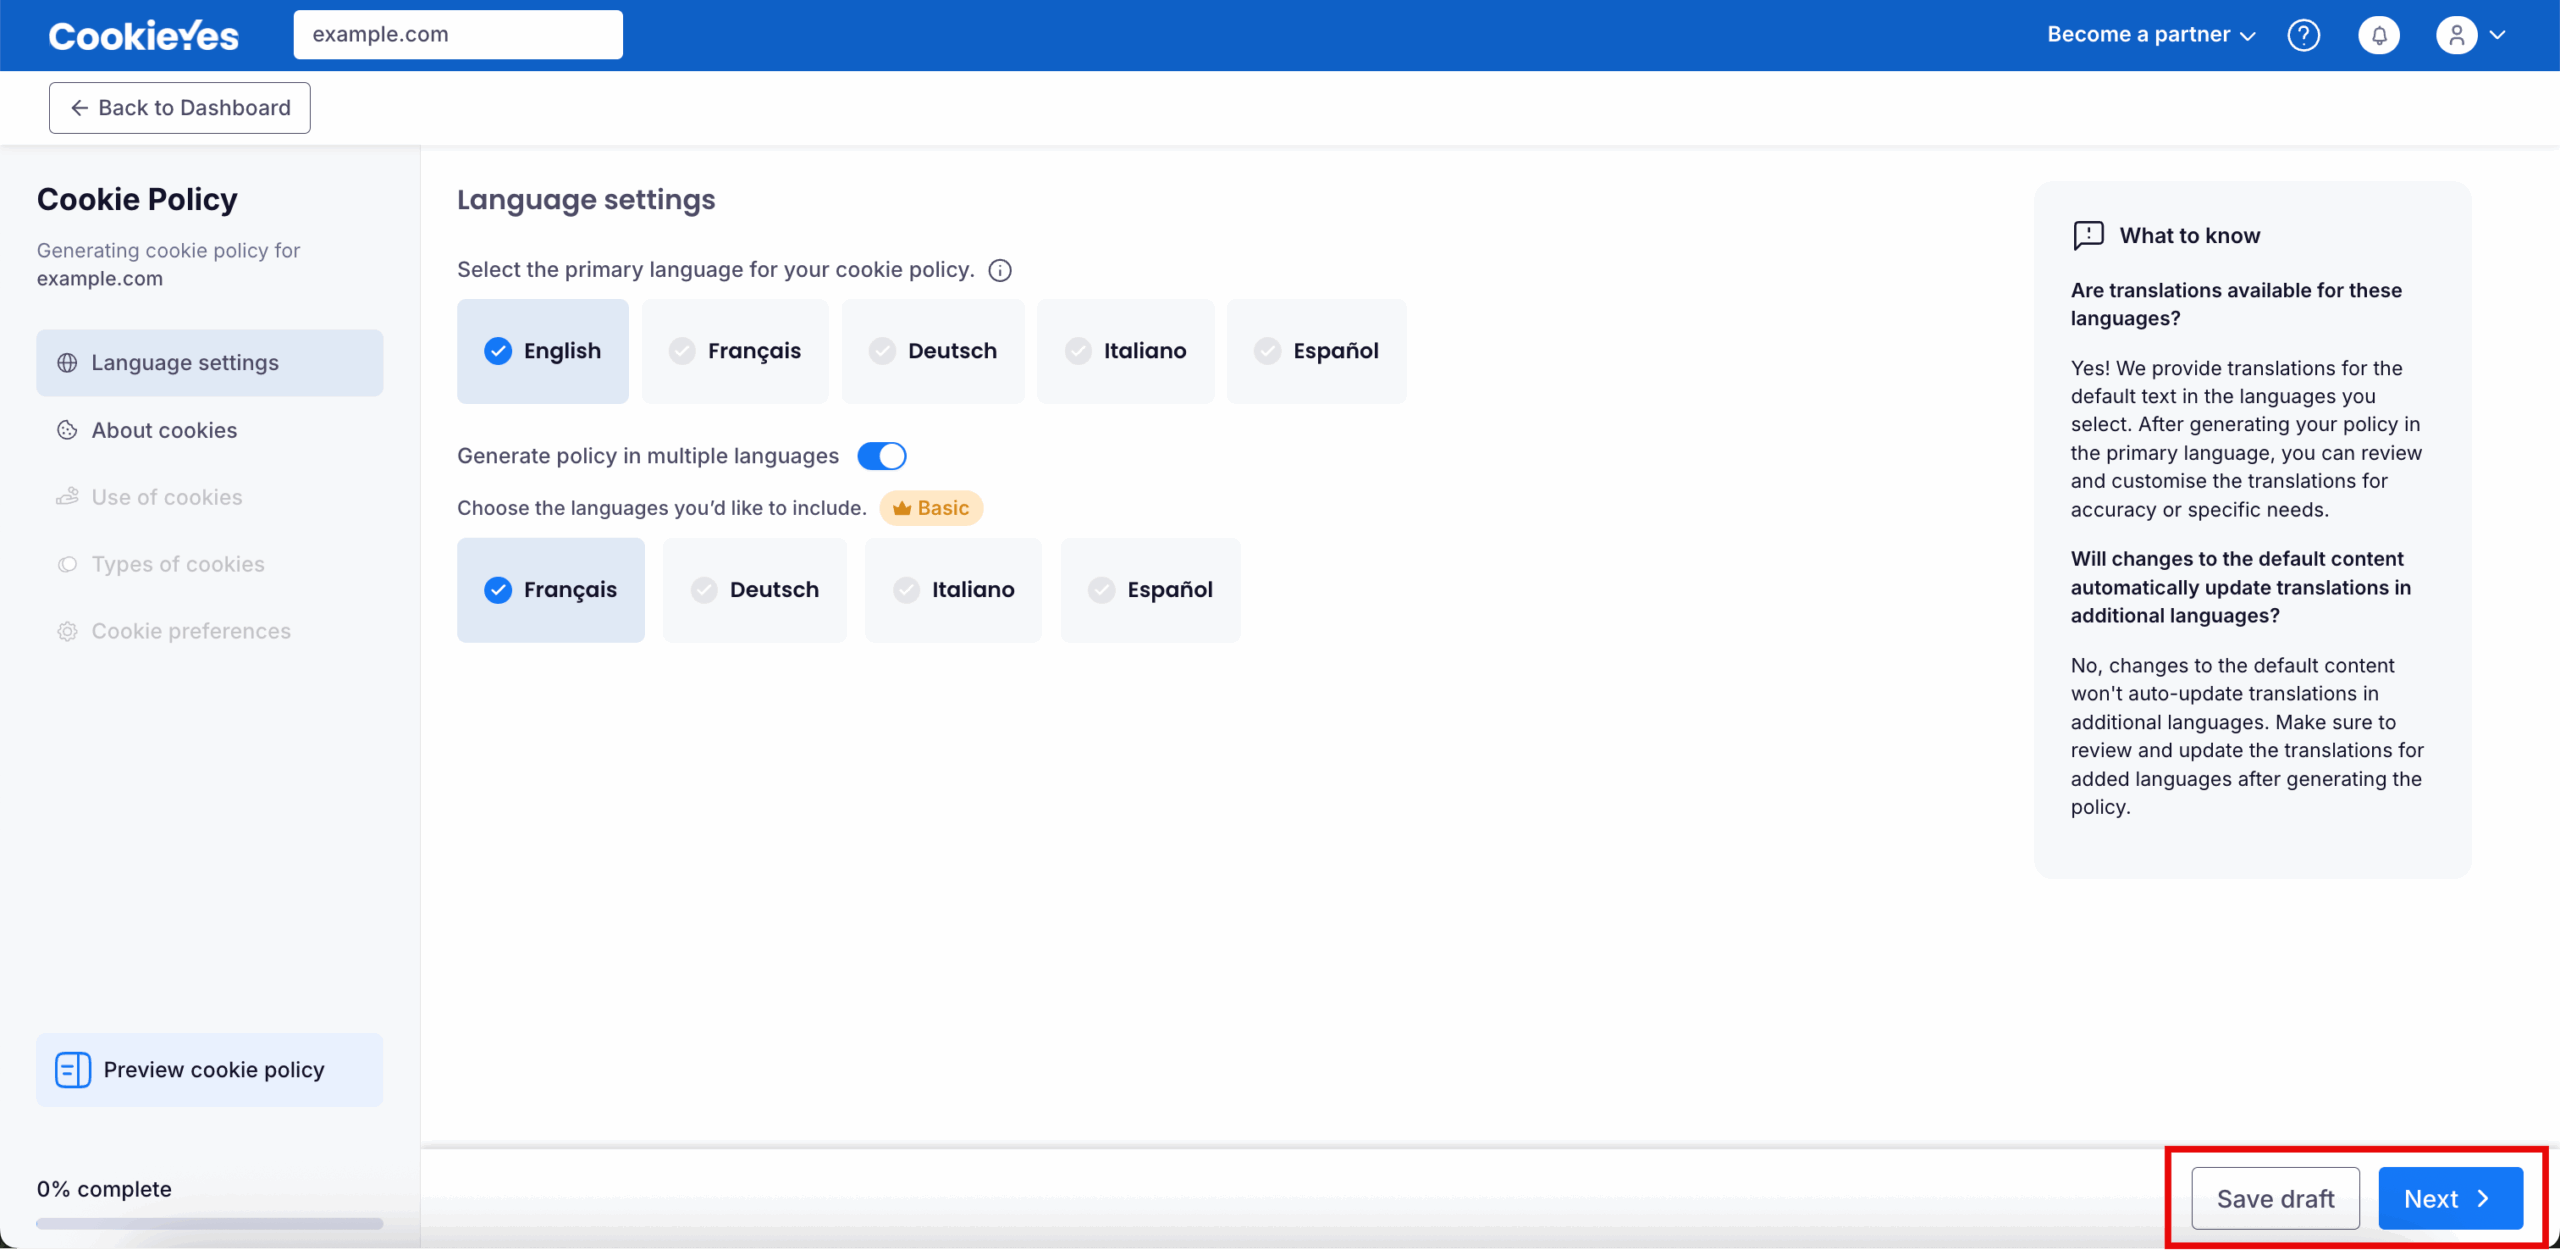
Save and Continue
After selecting your language preferences, click Save draft if you want to save your progress and return later or click Next to proceed to the next step: About cookies.
Step 2: Define the “About cookies” section
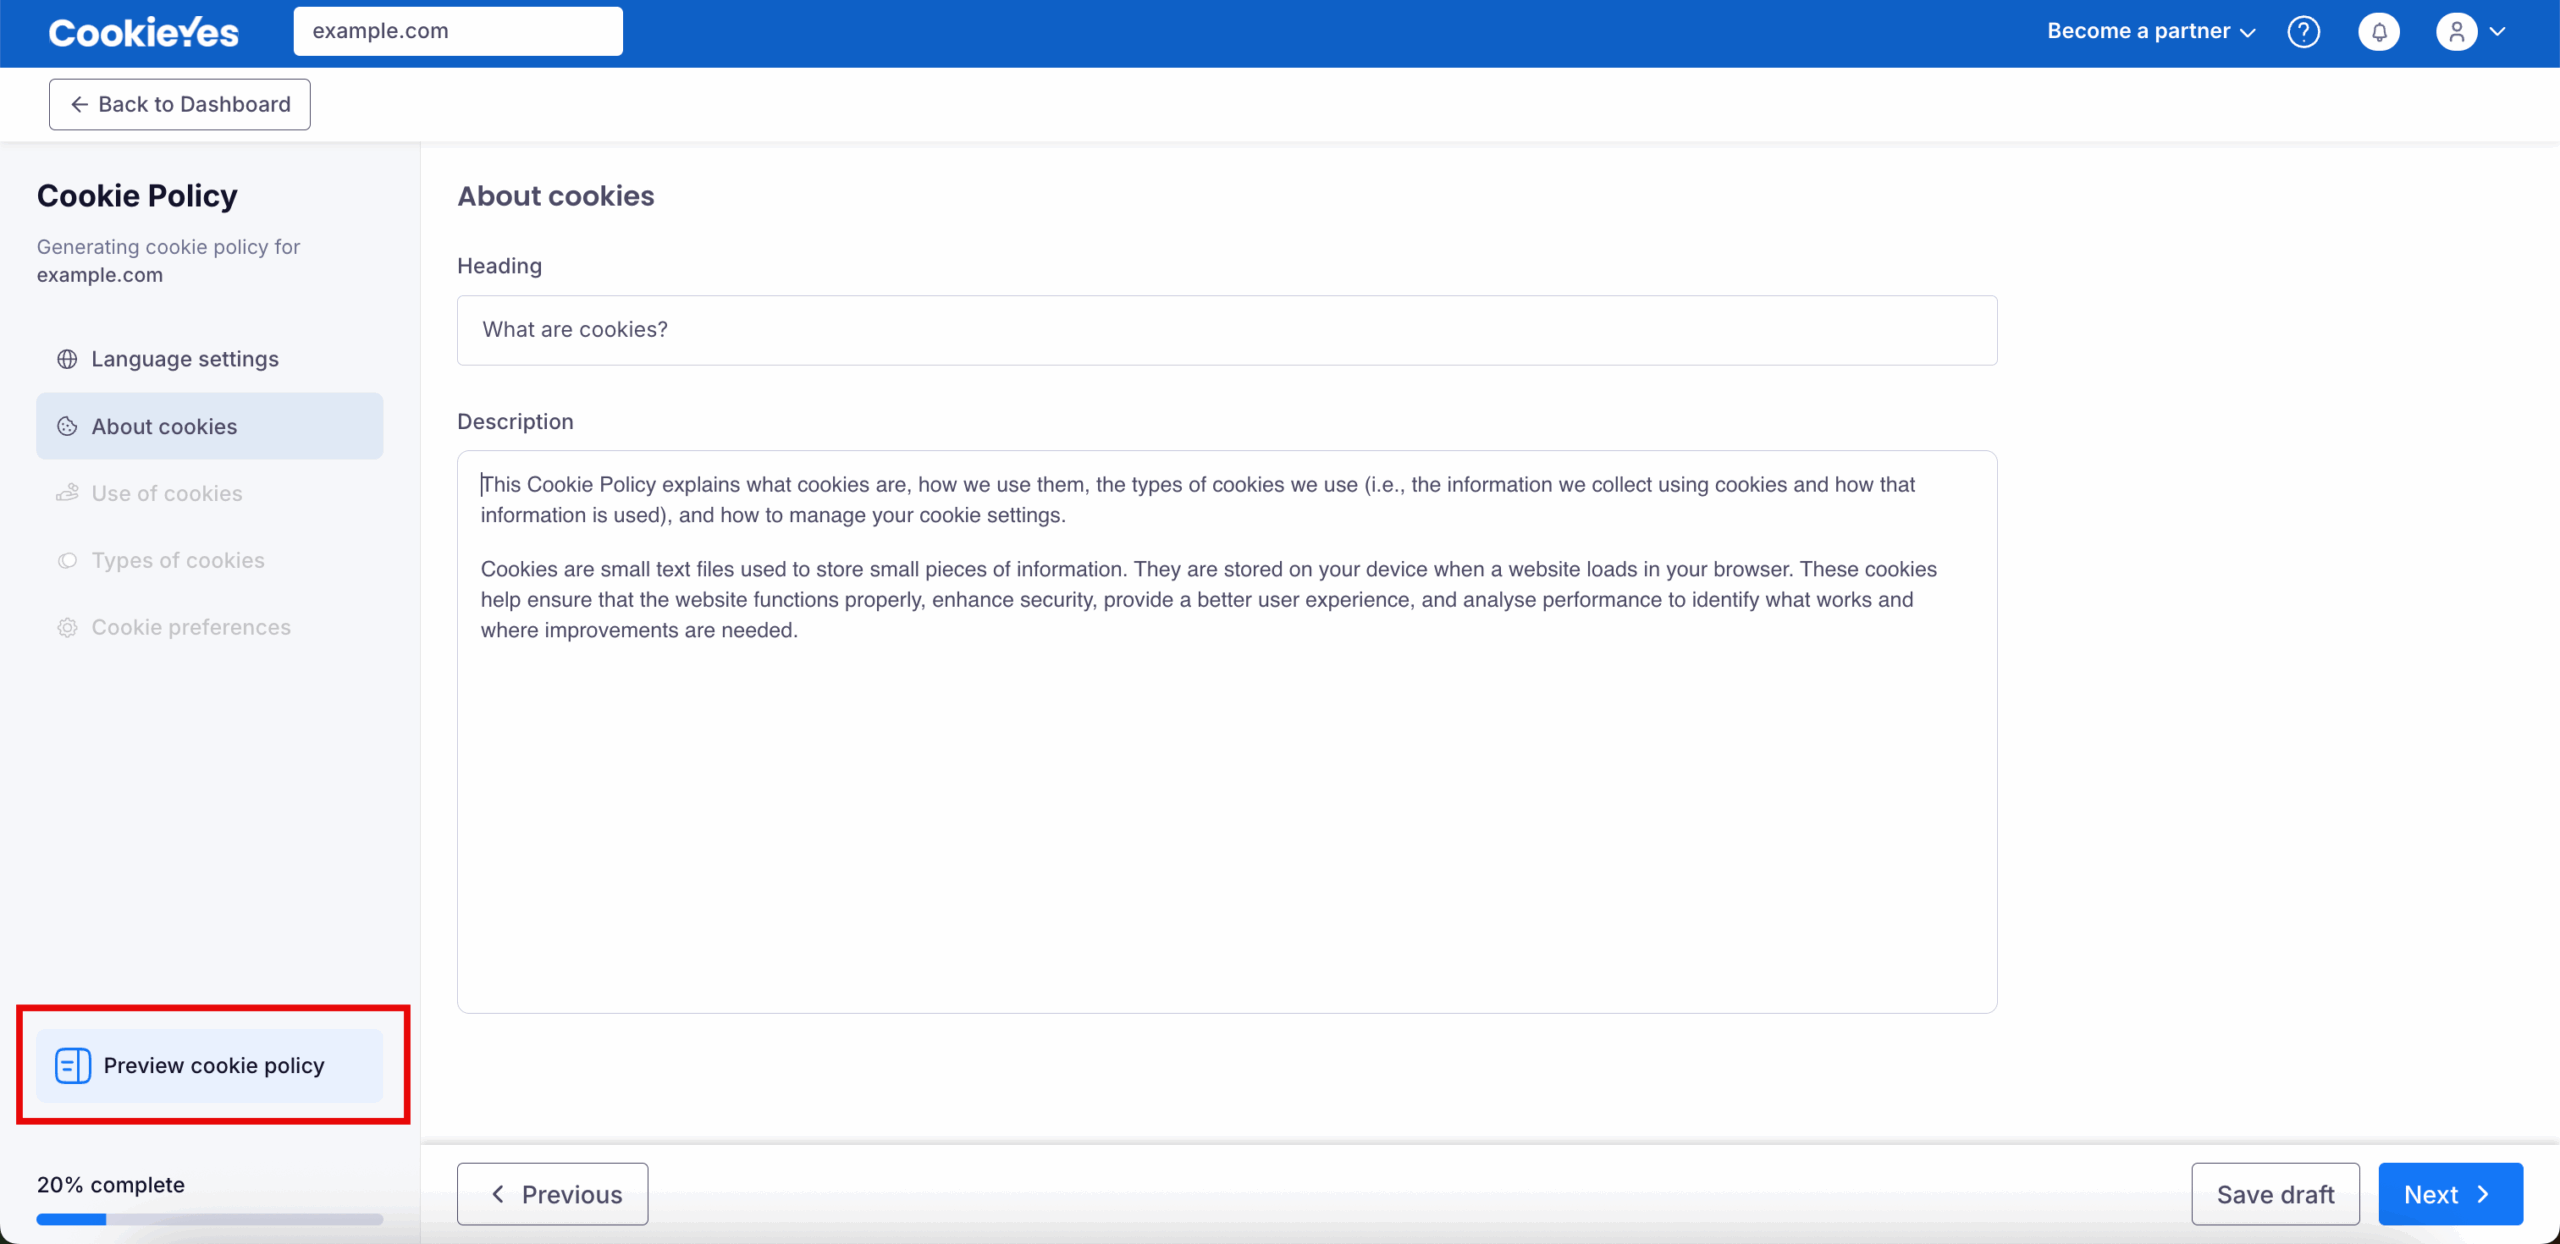
In this step, you can define the introductory section of your Cookie Policy by explaining what cookies are and why your website uses them.

Heading
Use the Heading field to specify a clear title for this section. You may keep the default text or customise it to match your website’s style and tone.
Add or Edit the Description
In the Description field, provide a clear explanation of cookies and their purpose. The default text covers what cookies are, why your website uses them and how they benefit users (such as improving functionality, security and performance). Edit or expand the text to ensure it matches your website’s practices.
Preview the Cookie Policy
Click Preview cookie policy (bottom left of the screen) to review how your content will appear to users. Use this option to confirm clarity, formatting and tone before proceeding.
Continue
Click Next to move to Use of cookies.
Step 3: Explain how cookies are used
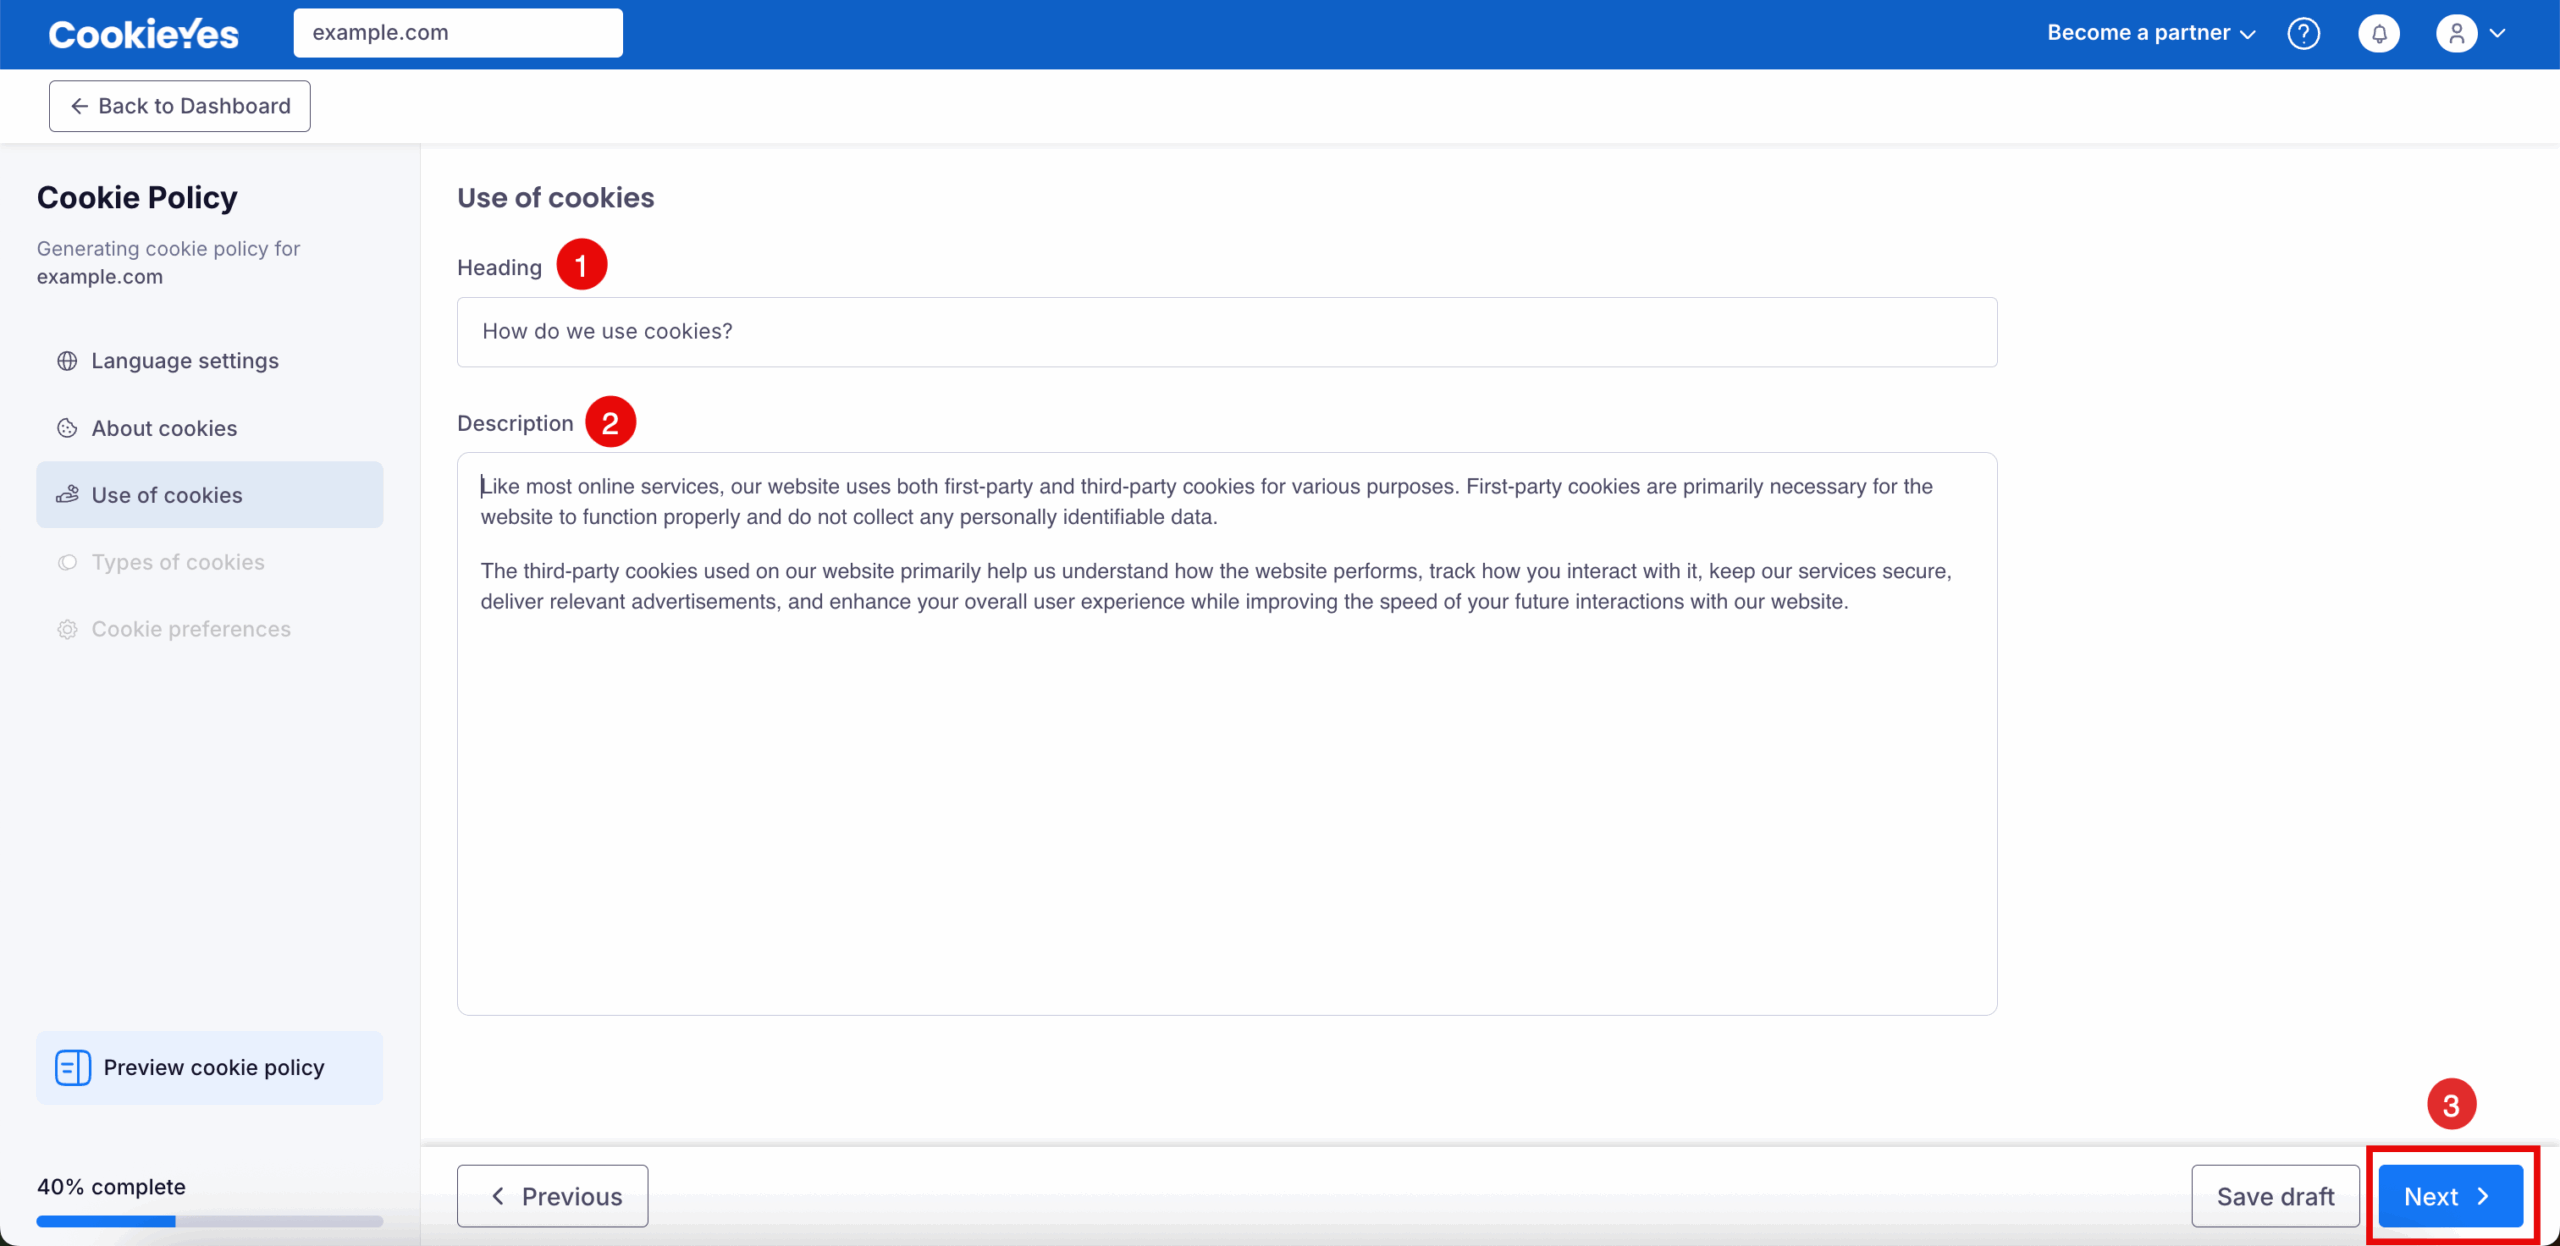
In this step, you’ll describe how your website uses cookies and explain their purpose to your users.
Heading
In the Heading field, enter a clear and user-friendly title. You can either use the default heading as is or modify it to match your site’s tone and audience.
Description
Use the Description field to explain in detail how your website uses cookies. The default text includes information on the use of first-party cookies (primarily for website functionality) and the role of third-party cookies (such as analysing site performance, tracking user interactions, enhancing security and providing relevant ads). You may update the description as needed to ensure accuracy for your website’s practices.
Save and Continue
When you’re ready, click Next to proceed to the next step, Types of Cookies.
Step 4: Review the types of cookies used
Heading
In the Heading field, you can keep the default title “Types of cookies we use” or edit it to better reflect your website’s tone and your audience’s expectations.
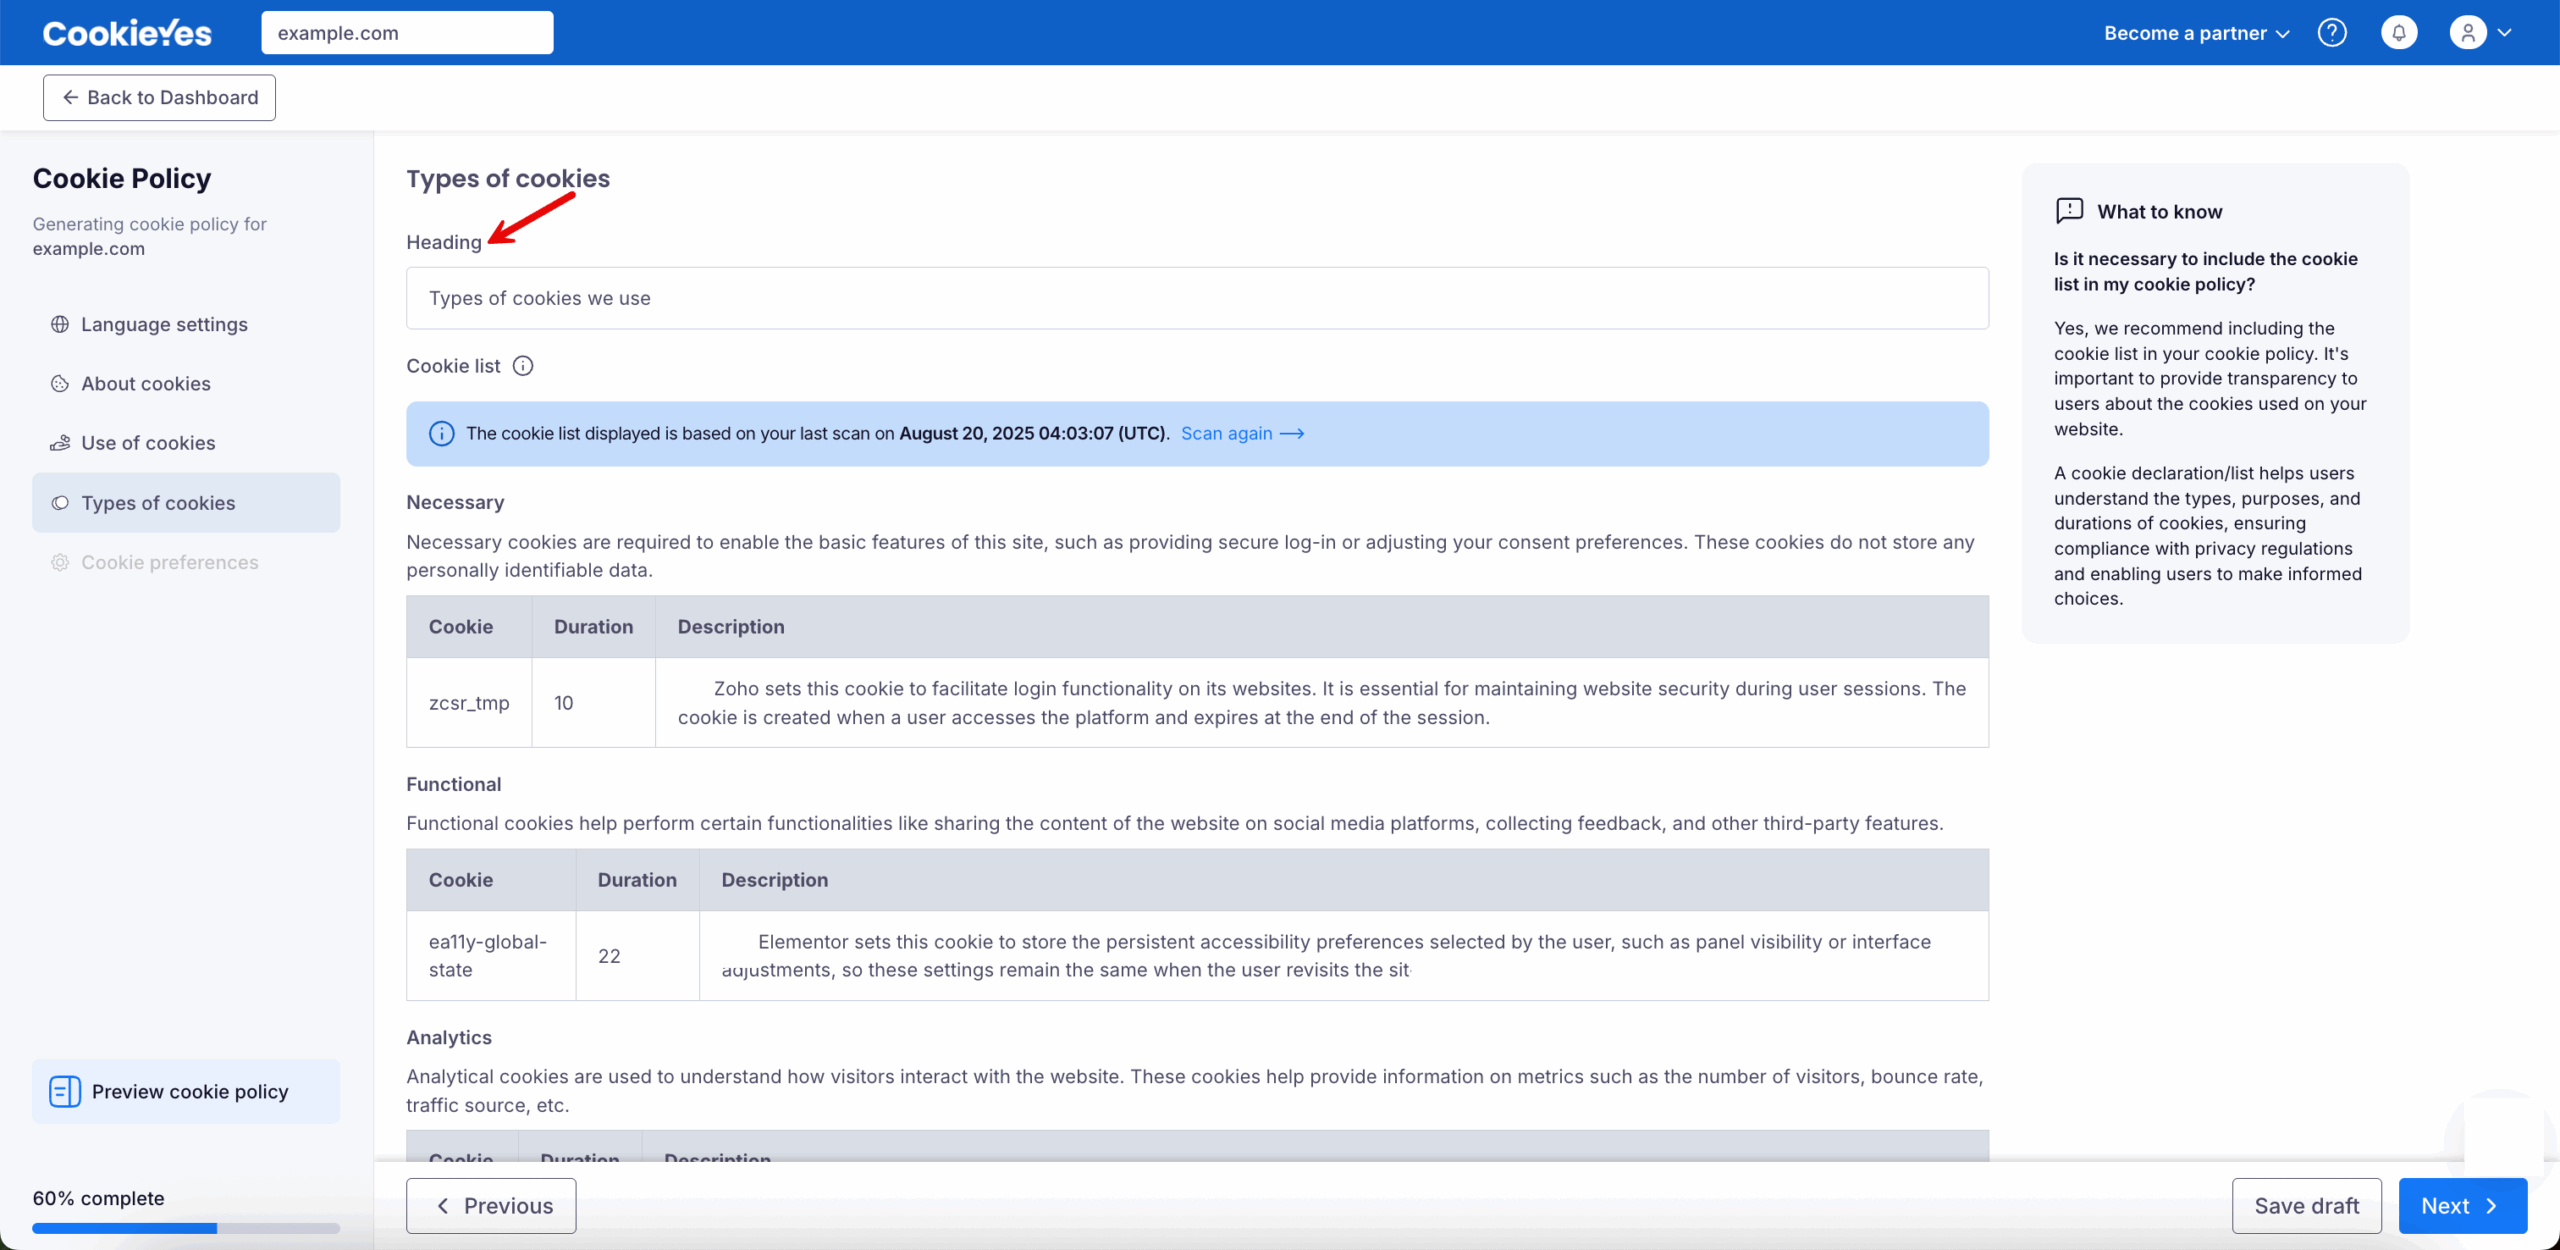
Review the cookie list
The cookie list shown here is based on your last website scan. To refresh the list, click Scan again. You’ll be redirected to the Cookie Manager, where you need to click Scan now to run a new scan.
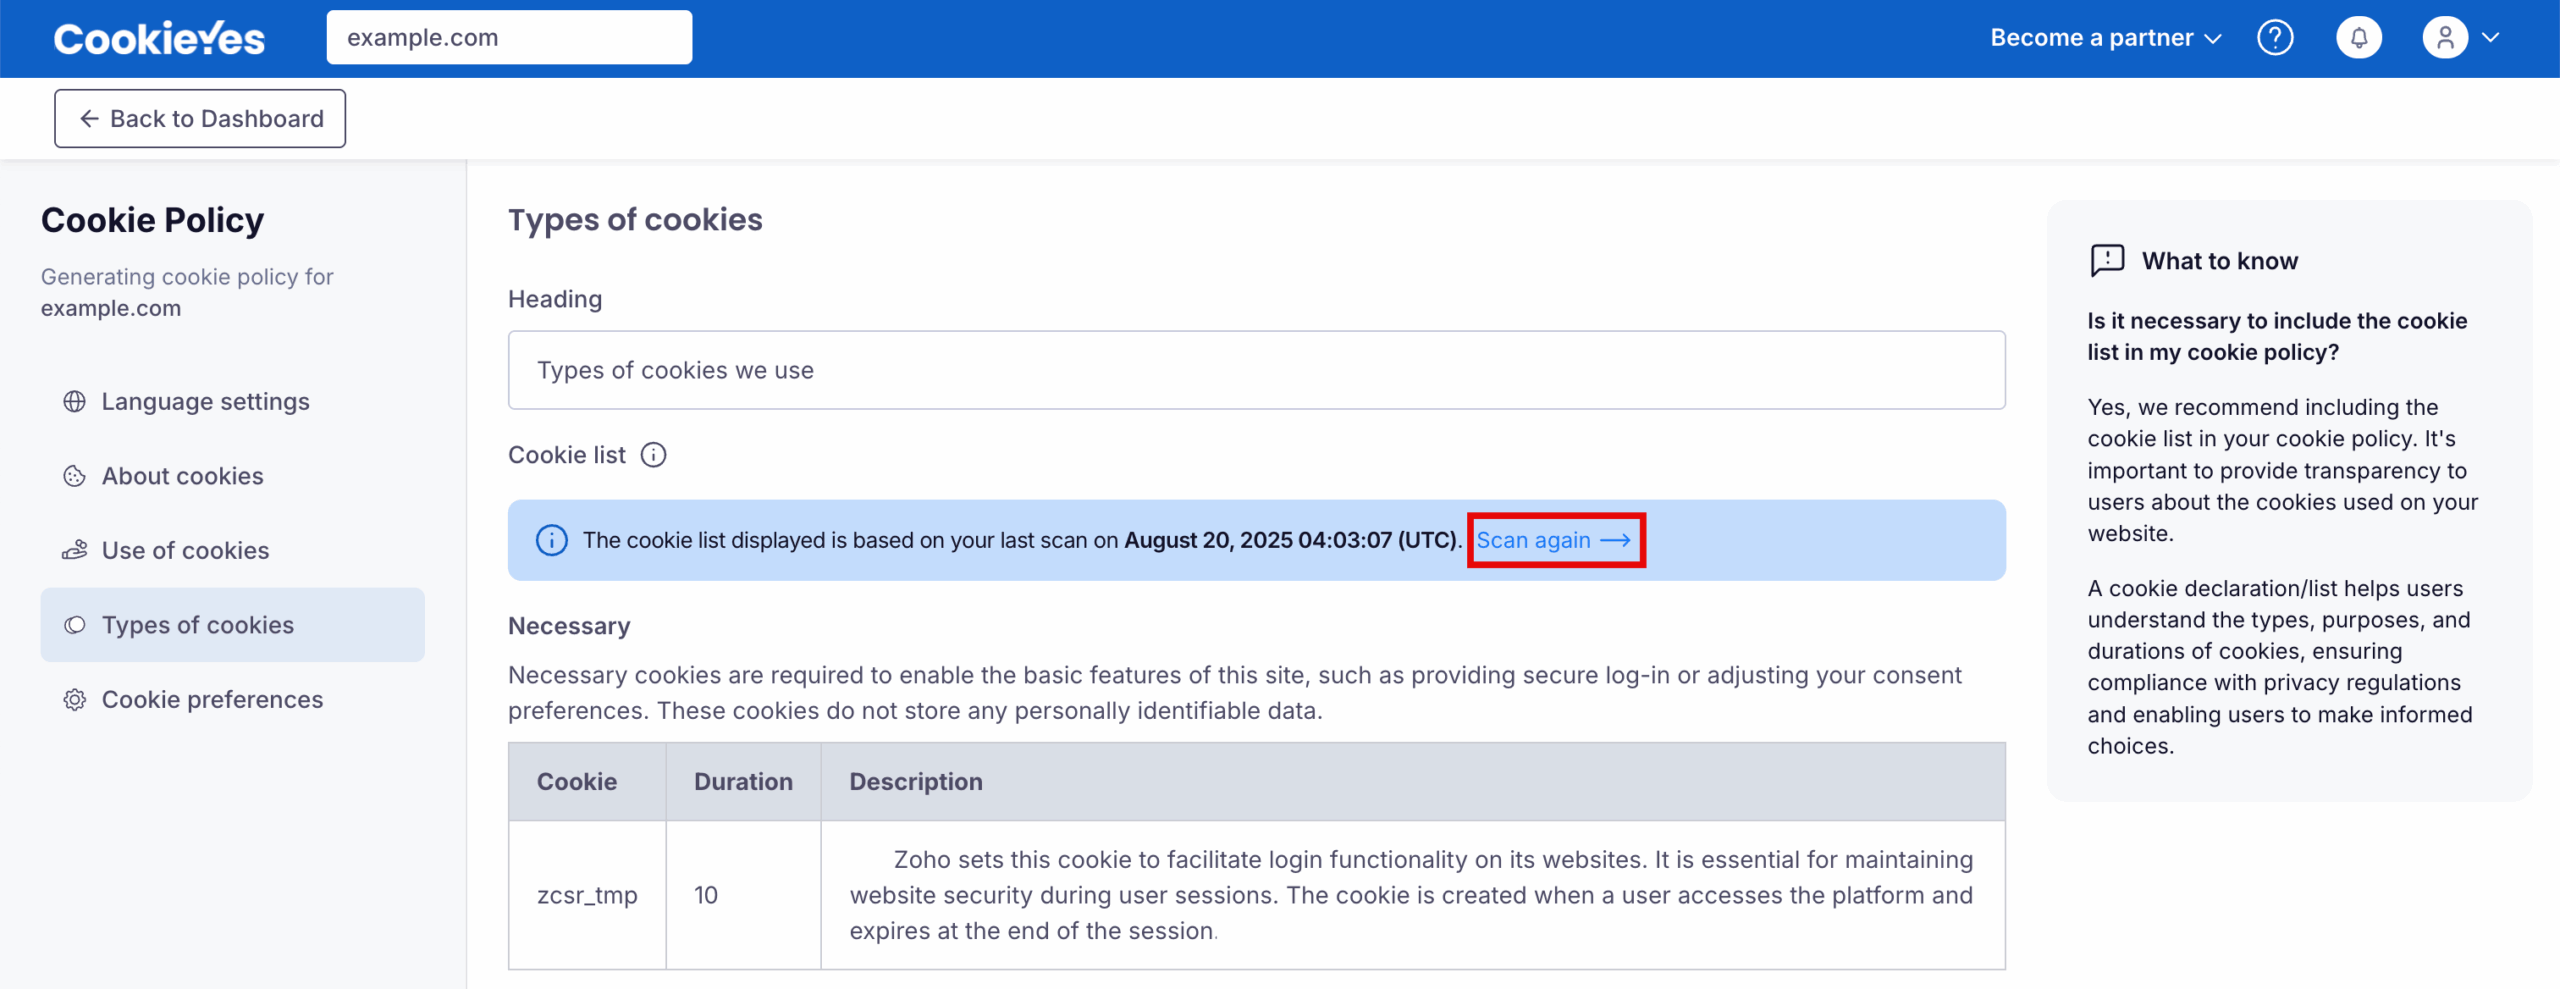
Refer: Scan Your Website
Check cookie categories and details
The list organises cookies into categories such as:
- Necessary – cookies required for basic site functionality and security.
- Functional – cookies enabling features like content sharing or feedback collection.
- Analytics – cookies for tracking and analysing visitor interactions.
- Performance – cookies for monitoring site performance and improving user experience.
- Advertisement – cookies are used to deliver relevant ads.
Each entry includes details about the cookie’s name, duration and purpose. Confirm that the descriptions are clear and accurate.
Proceed
After reviewing the cookie list, click Next to proceed to Cookie Preferences.
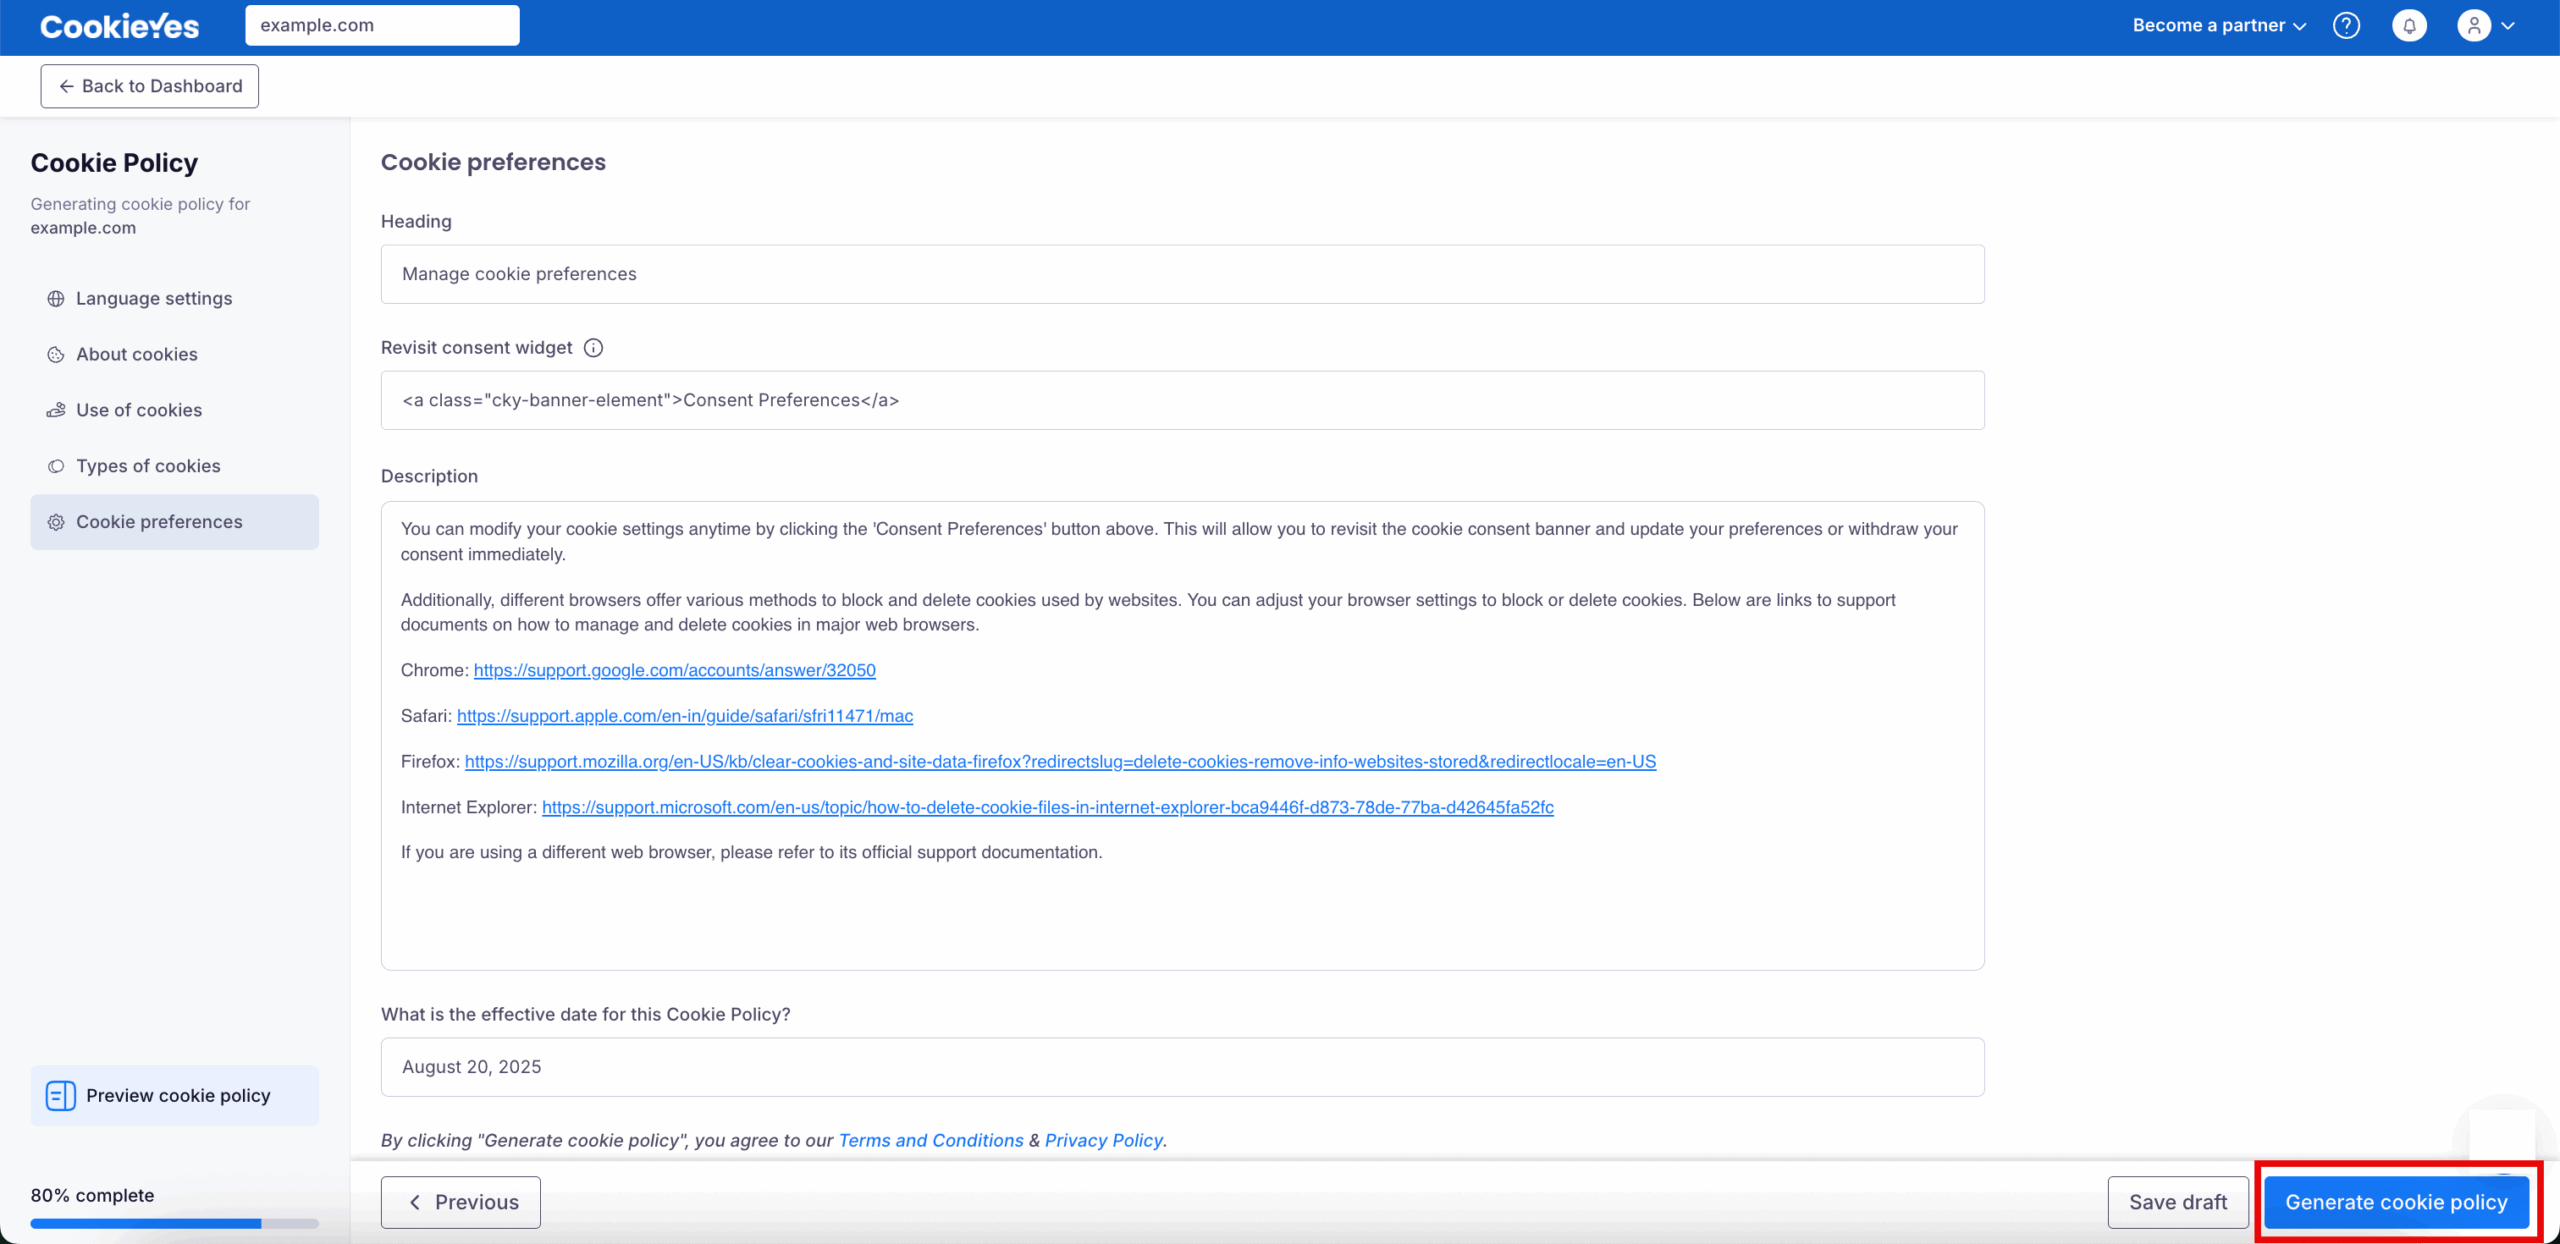
Step 5: Configure cookie preferences for users
Heading
Use the Heading field to title this section. The default text is “Manage cookie preferences”, but you can update it to align with your site’s tone or user expectations.
Revisit consent widget code
This section includes a pre-generated HTML snippet that enables users to reopen the consent banner after initial interaction.
Description
The Description box explains how users can manage their cookie settings. It also includes helpful links to official browser support pages for managing or deleting cookies. You can customise this description to include additional browser types, site-specific instructions or translations, depending on your audience.
Set the effective date
This is the Effective Date of your cookie policy. By default, it shows the current date, but you may change it if needed. This date indicates when your cookie policy comes into effect.
Finalise or Save your policy
Click Generate cookie policy to complete the process and publish the cookie policy, or click Save draft if you want to continue editing later without publishing.
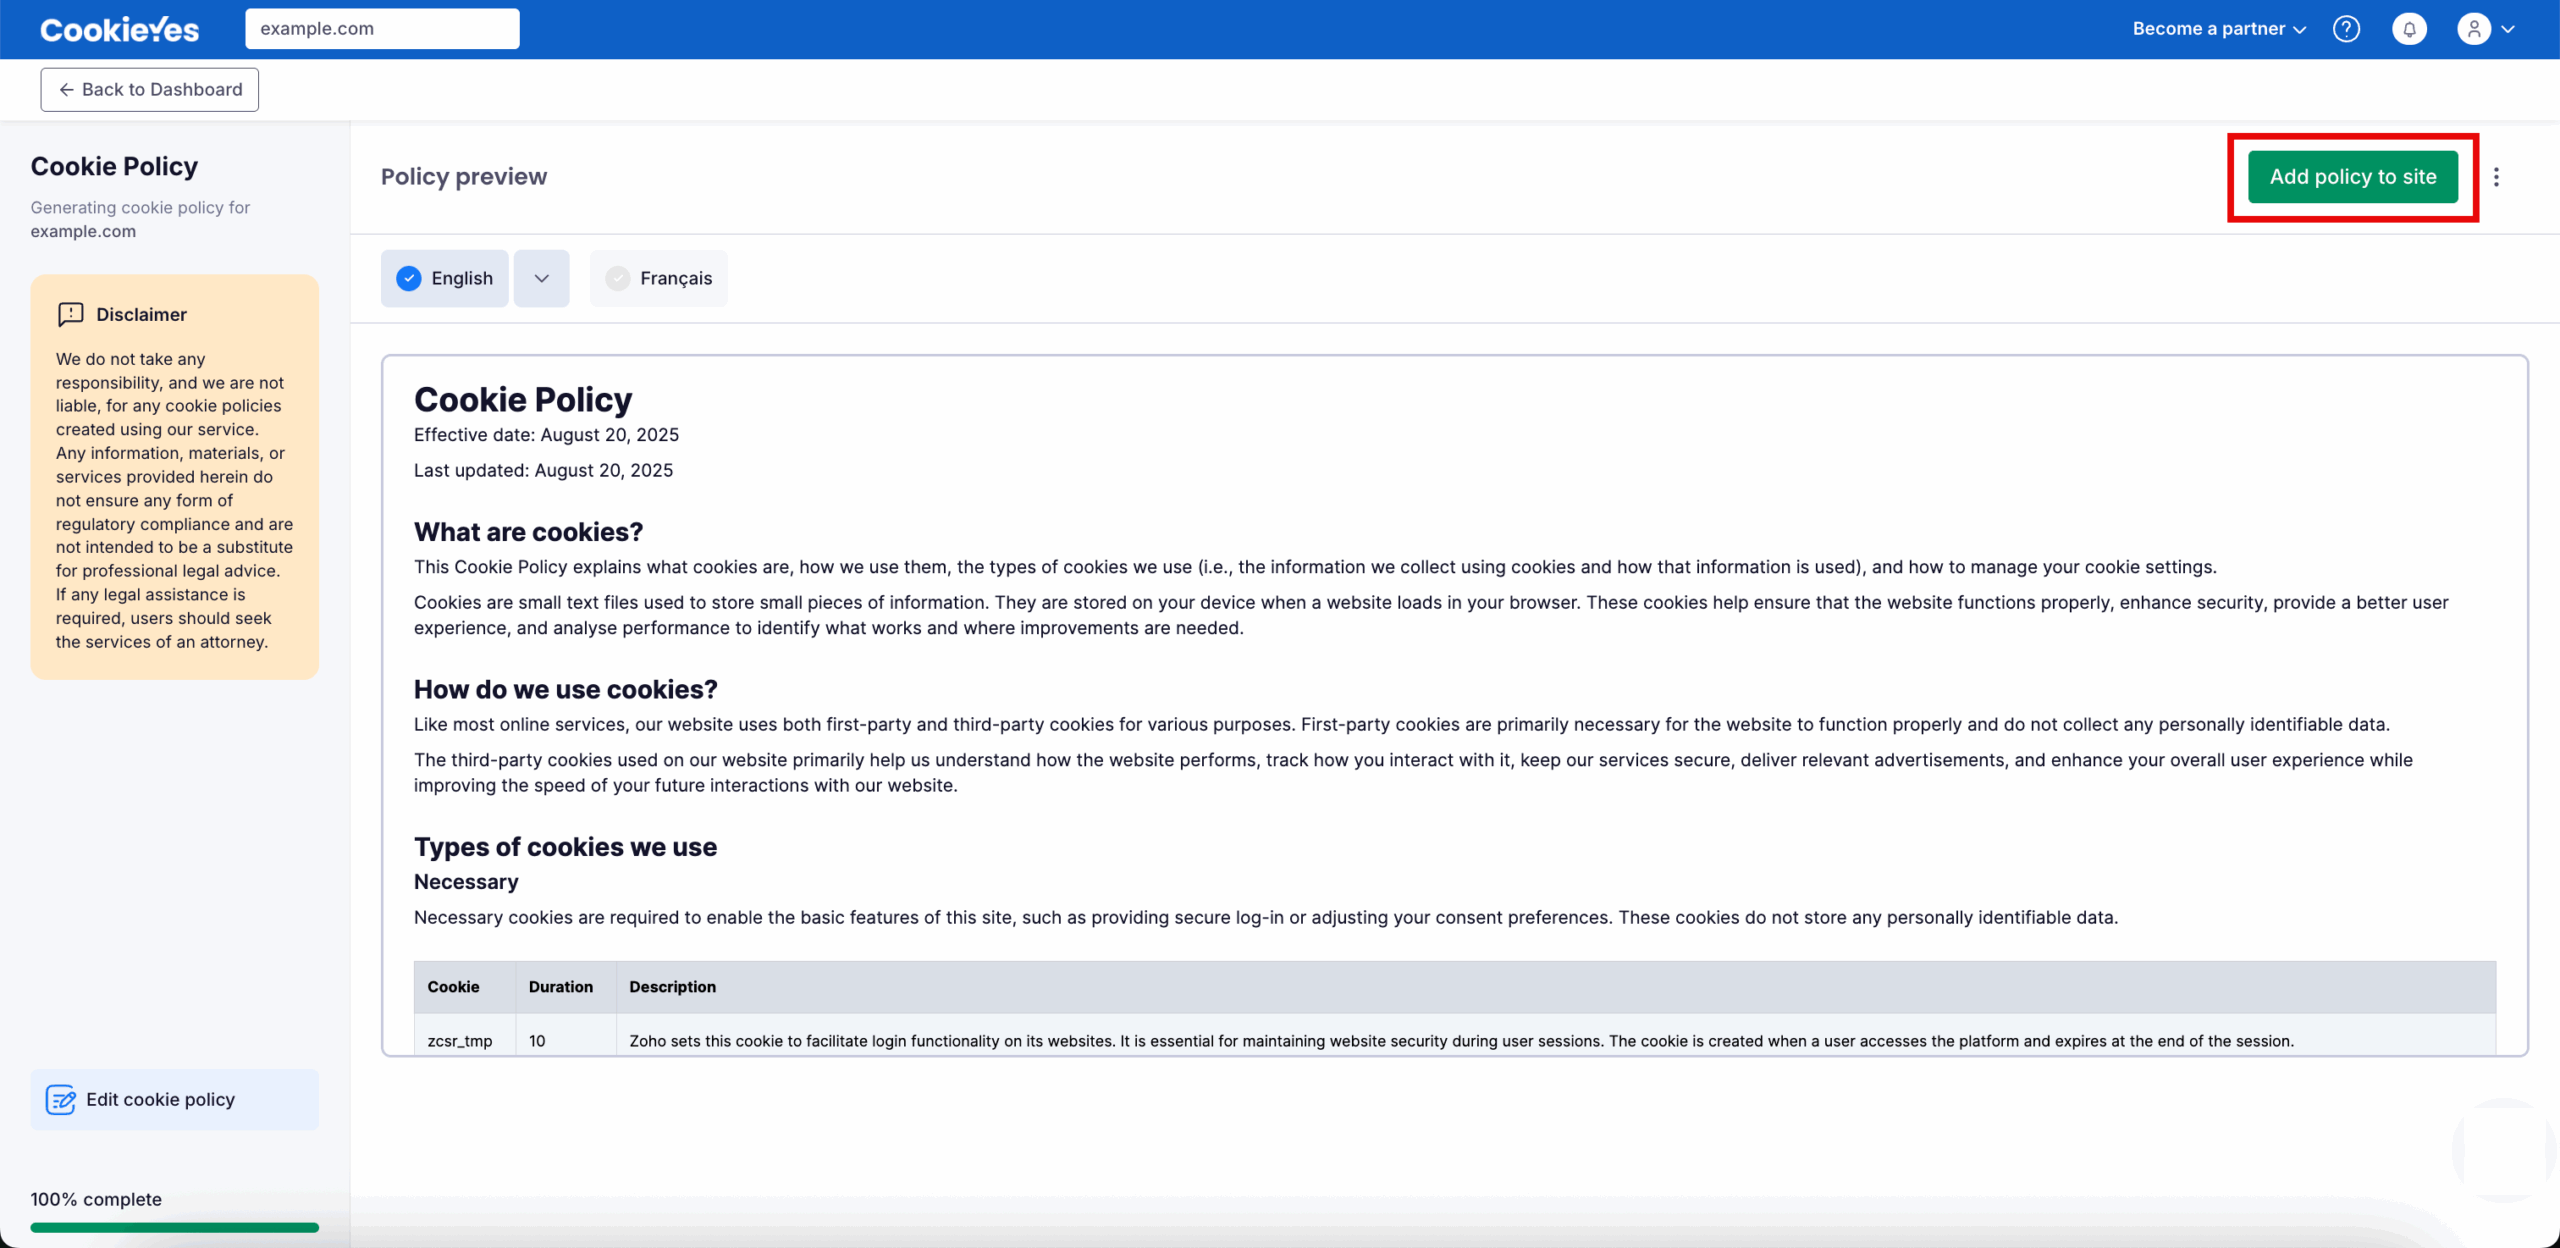
Step 6: Generate and Add the Cookie Policy to Your Website
Review the Cookie Policy Preview in the selected language(s). Use the language selector to switch between languages if multiple languages are enabled. If you need to make changes, click Edit cookie policy to return to the editor.
When you’re ready, click Add policy to site in the top-right corner.
Add the cookie policy to your Wix website
After clicking Add policy to site, a modal window appears prompting you to choose how to add the policy to your website.
The Code Snippet method is not supported on Wix websites. To add a cookie policy to Wix, you must use the HTML format option.
Step 1: Copy the cookie policy code
- Choose the HTML format methods.
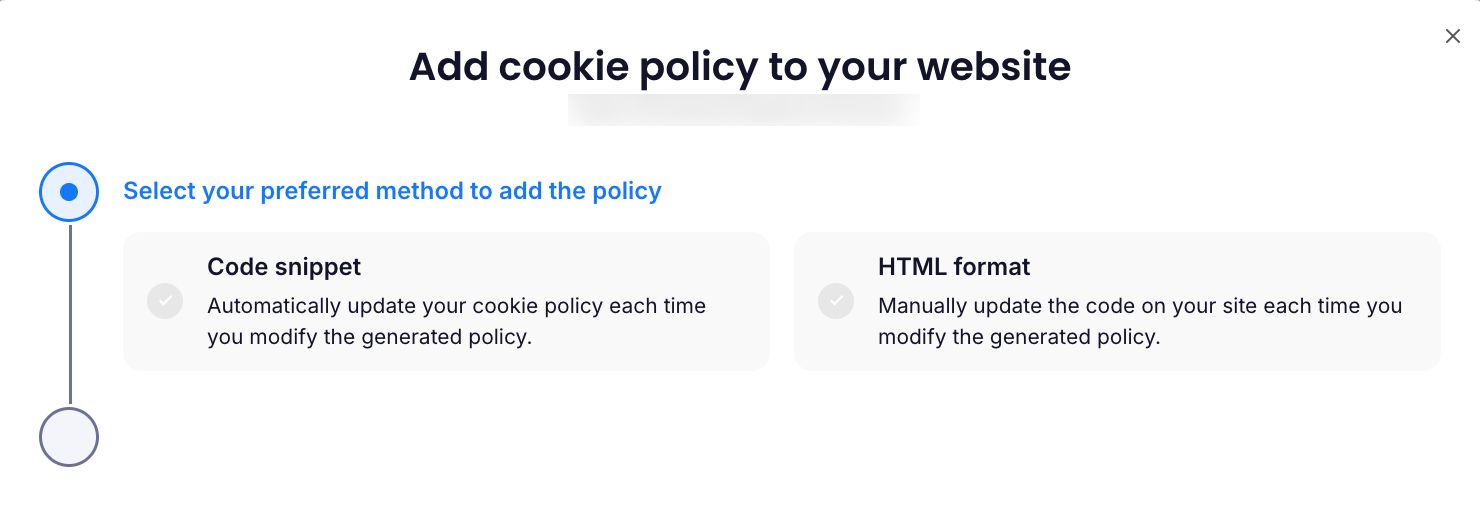
- Select the language.
- Click the Copy code to copy the generated HTML code.
You can now paste this code into a dedicated Cookie Policy page in your Wix website.
Use the Send code to a teammate option if someone else manages your website content.
Step 2: Create a Cookie Policy page in Wix
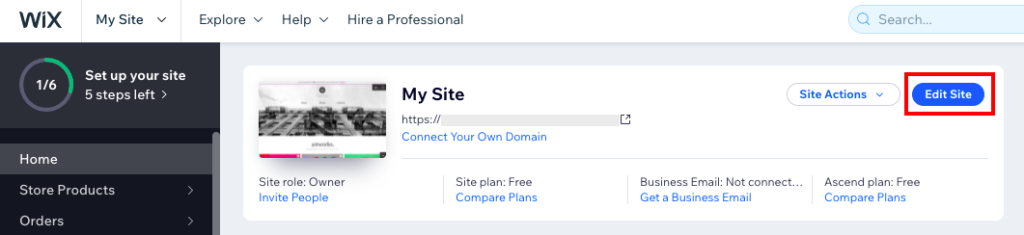
- Head to your Wix account and open your site’s Dashboard. Then select Edit Site.
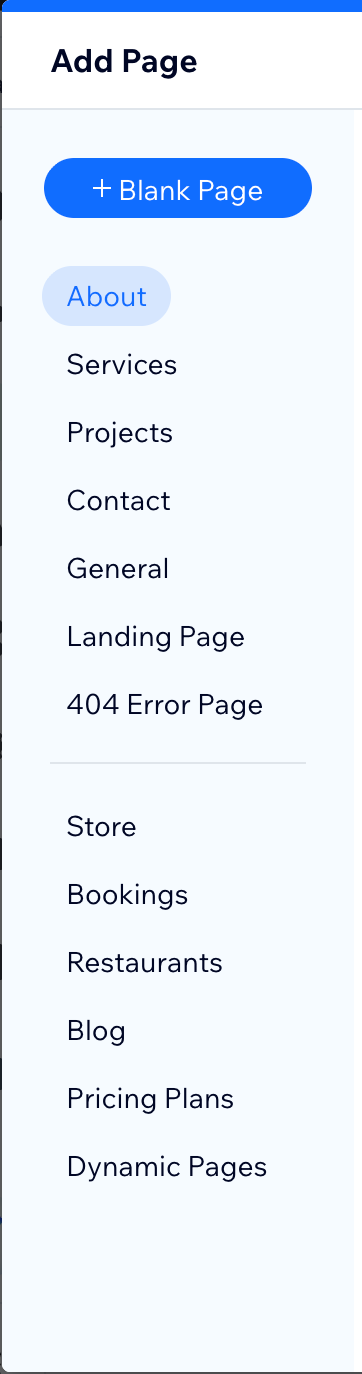
- To add a new page to your site, select the Pages & Menu icon from the side panel. Now click +Add Page.

- Select +Blank Page and add the name as ‘Cookie Policy’ in the title field and click Done.
Step 3: Embed the cookie policy on the page
- In the newly created page, click on the Add (+) from the side panel and then select Embed code > Embed HTML.
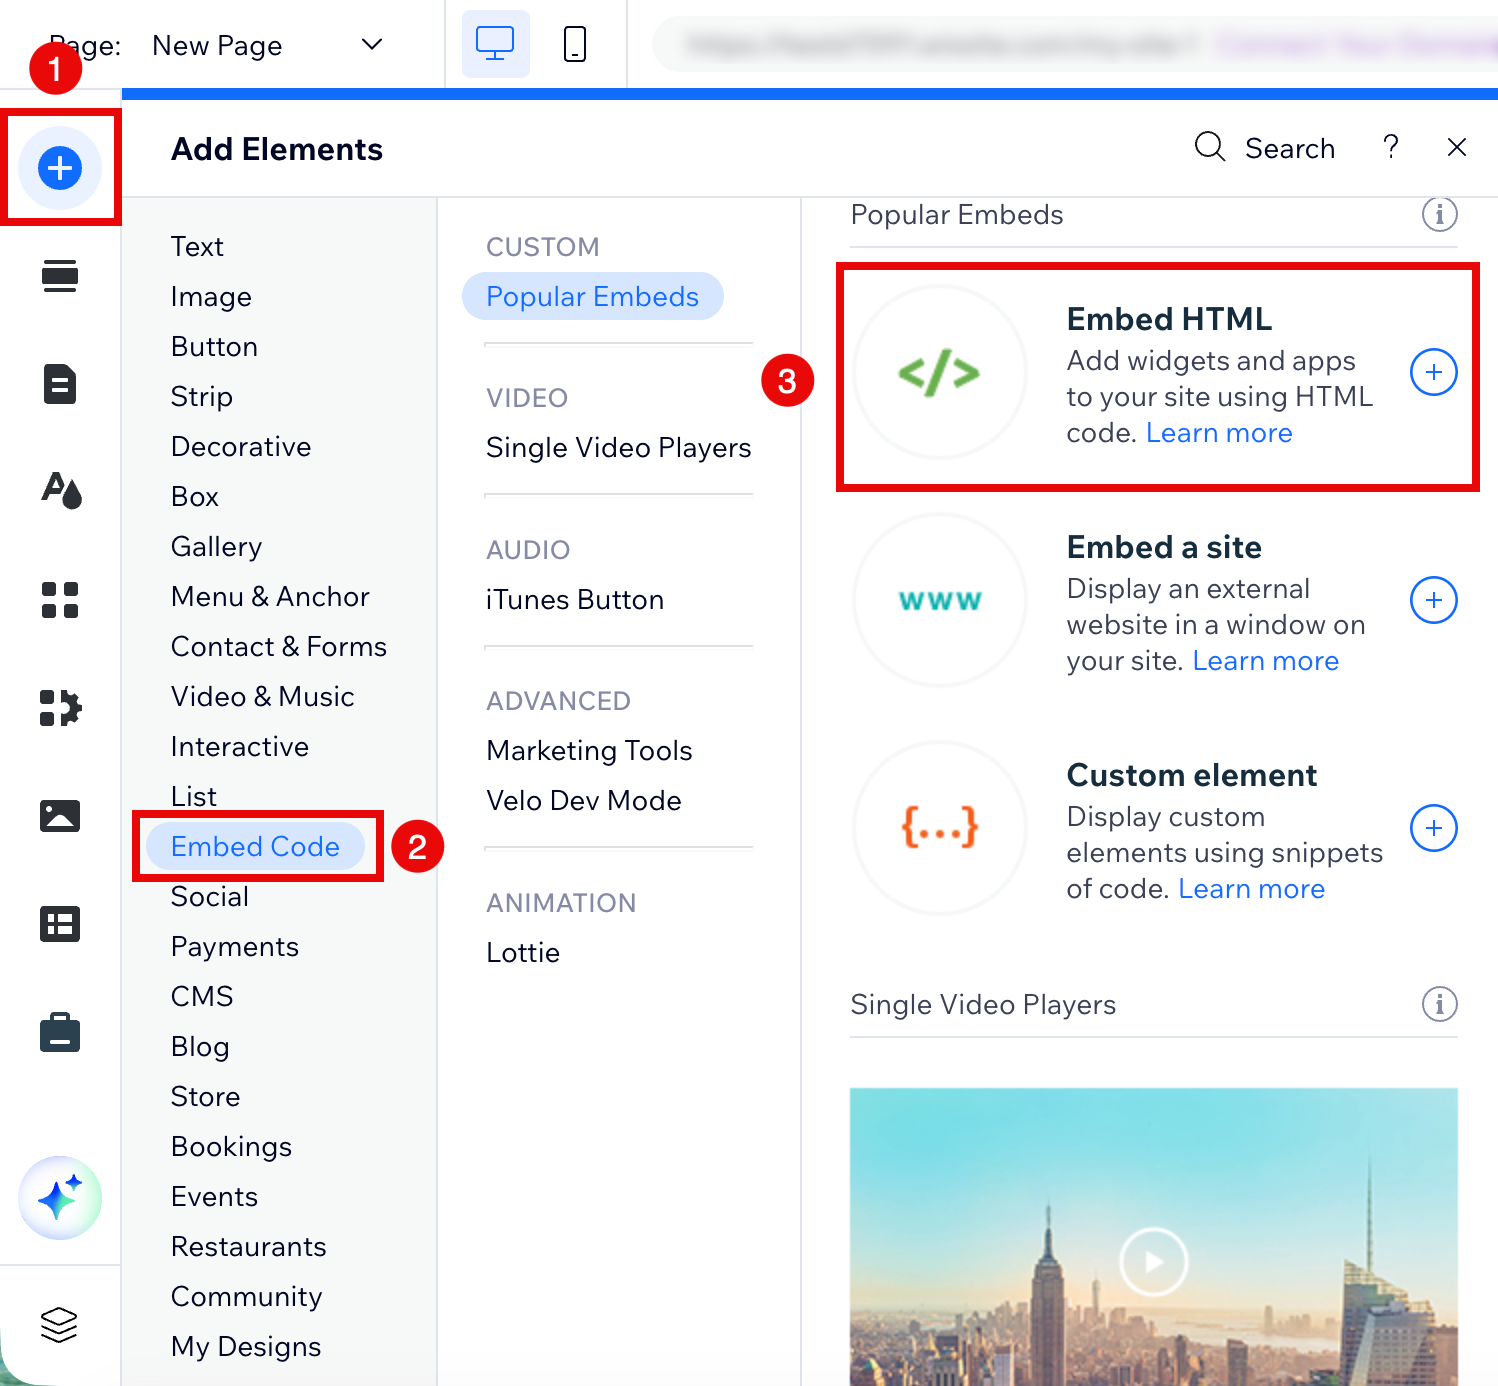
- Select the HTML block, click Enter Code and paste the copied cookie policy code(Code Snippet/HTML Format).
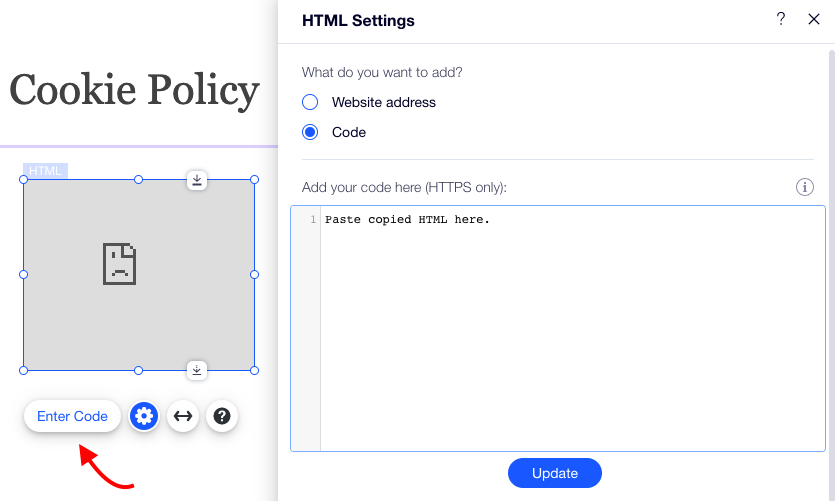
- Click Update.
Step 4: Enable the Cookie Settings button
To activate the Cookie Settings button within the cookie policy:
- Locate the anchor element with the inner text Cookie Settings in the embedded HTML code.
Locate the anchor element with the inner text “Cookie Settings” within the HTML code of your Cookie Policy page.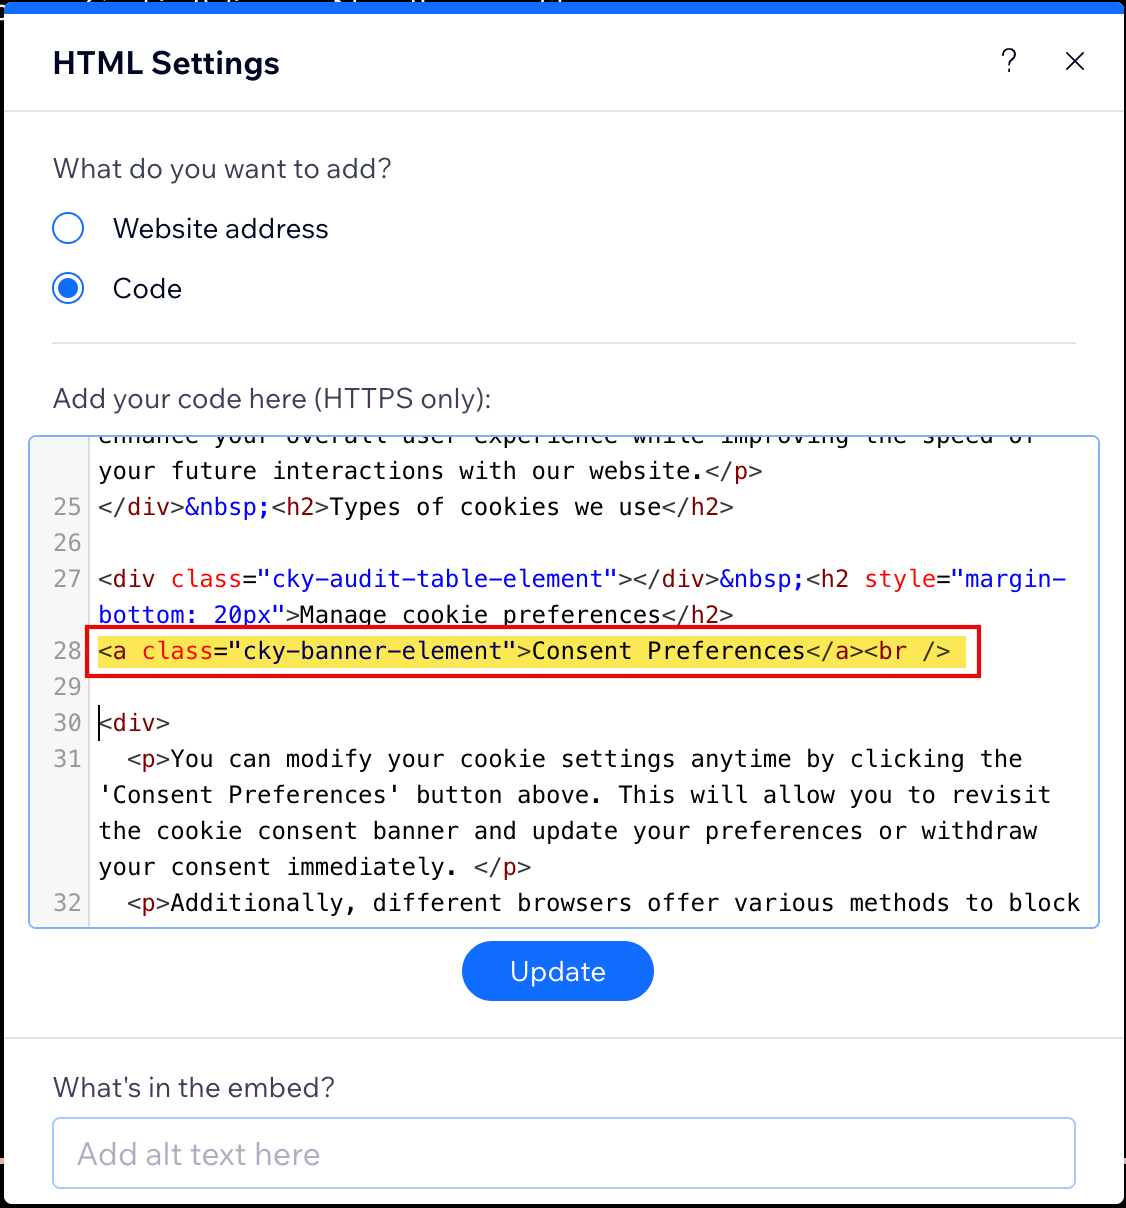
- Replace it with the following code snippet:
<a class="cky-banner-element" onclick="window.parent.postMessage({message:'cookieyes-settings'}, 'https://parent-domain.com/')">Cookie Settings</a> - Replace
hwith your website domain.ttps://parent-domain.com - Click the Update button to apply the changes.
Step 5: Display the cookie audit table
To display the cookie audit table under Types of cookies we use, follow these steps:
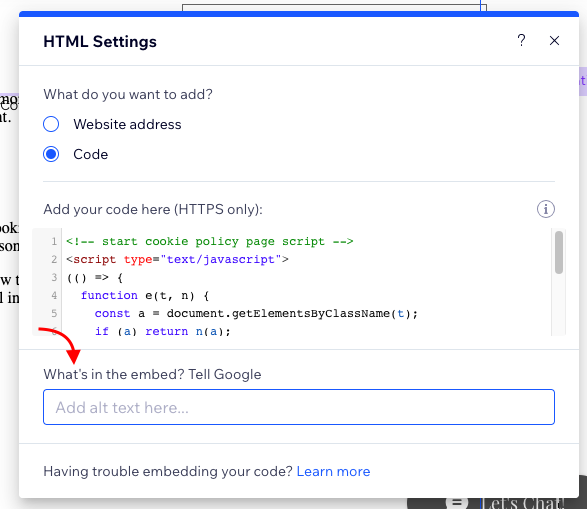
- Add the script to the cookie policy page
Add the following script at the top of the Cookie Policy page. Replacehttps://parent-domain.comwith your domain and click Update.
<!-- start cookie policy page script -->
<script type="text/javascript">
  (() => {
    function e(t, n) {
      const a = document.getElementsByClassName(t);
      if (a) return n(a);
      setTimeout(() => {
        e(t, n);
      }, 500);
    }

    window.addEventListener &&
      window.addEventListener("load", () => {
        e("cky-audit-table-element", () => {
          window.parent.postMessage(
            { message: "get-audit-table" },
            "https://parent-domain.com"
          );
        });
      });

    window.addEventListener(
      "message",
      (e) => {
        if (
          "https://parent-domain.com" !== e.origin &&
          "audit-table-content" !== e.data.message
        )
          return;

        document.getElementsByClassName(
          "cky-audit-table-element"
        )[0].innerHTML = e.data.html;
        document.head.insertAdjacentHTML(
          "beforeend",
          `<style id="cky-audit-table-style">${e.data.style}</style>`
        );
      },
      false
    );
  })();
</script>
<!-- end cookie policy page script -->

- Add custom code in Wix settings
- Add the following custom code in Wix Settings. Replace https://iframe-domain.filesusr.com with your iframe domain.
<script>
(() => {
function e(t, n, i = false, o = false) {
const s = o ? document.getElementById(t) : document.querySelector(t);
if (s && !i || (s && i && ["", " ", " "].indexOf(s.innerHTML) === -1)) return n(s);
setTimeout(() => {
e(t, n, i, o);
}, 500);
}
window.addEventListener("load", () => {
document.body.insertAdjacentHTML(
"afterBegin",
'<div class="cky-audit-table-element" style="display: none;"></div>'
);
});
window.addEventListener("message", (t) => {
if ("https://iframe-domain.filesusr.com" !== t.origin) return;
if (t.data.message === "cookieyes-settings") {
window.revisitCkyConsent();
return;
}
if (t.data.message === "get-audit-table") {
e('[title="Embedded Content"]', (t) => {
e(".cky-audit-table-element", (n) => {
e("cky-audit-table-style", (e) => {
t.contentWindow.postMessage(
{
html: n.innerHTML,
style: e.innerHTML,
message: "audit-table-content",
},
"https://iframe-domain.filesusr.com"
);
}, true, true);
}, true);
});
}
}, false);
})();
</script>

Refer: To get your iframe domain from the Wix website, refer.
2. If you have provided any text in the field “What’s in the embed?” of HTML Settings where you have inserted the cookie policy code, you need to replace the attribute value of title="Embedded Content" conditional check within the event listener (line 25) of the above code snippet.
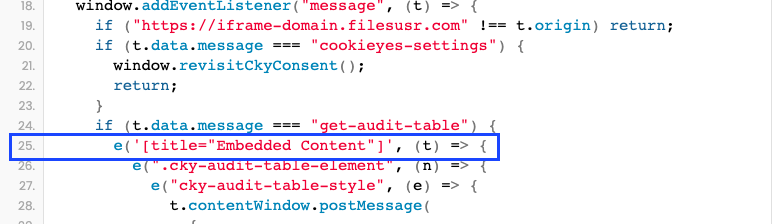
For example, if you have entered “Demo Content” in the field “What’s in the embed?“, modify the code as shown below:
<script>
(() => {
function e(t, n, i = false, o = false) {
const s = o ? document.getElementById(t) : document.querySelector(t);
if (s && !i || (s && i && ["", " ", " "].indexOf(s.innerHTML) === -1)) return n(s);
setTimeout(() => {
e(t, n, i, o);
}, 500);
}
window.addEventListener("load", () => {
document.body.insertAdjacentHTML(
"afterBegin",
'<div class="cky-audit-table-element" style="display: none;"></div>'
);
});
window.addEventListener("message", (t) => {
if ("https://iframe-domain.filesusr.com" !== t.origin) return;
if (t.data.message === "cookieyes-settings") {
window.revisitCkyConsent();
return;
}
if (t.data.message === "get-audit-table") {
e('[title="Demo Content"]', (t) => {
e(".cky-audit-table-element", (n) => {
e("cky-audit-table-style", (e) => {
t.contentWindow.postMessage(
{
html: n.innerHTML,
style: e.innerHTML,
message: "audit-table-content",
},
"https://iframe-domain.filesusr.com"
);
}, true, true);
}, true);
});
}
}, false);
})();
</script>
Step 6: Preview and publish
Preview the Cookie Policy page to ensure the content, cookie settings button, and audit table display correctly. When ready, click Publish.
Conclusion
You’ve now successfully generated and added a Cookie Policy to your Wix website using CookieYes. By embedding the policy correctly and enabling features like the Cookie Settings link and cookie audit table, you ensure transparency for users and meet key compliance requirements under privacy regulations such as the GDPR and ePrivacy Directive.
Whenever your website’s cookie usage changes, you can update the policy directly from the CookieYes dashboard and replace the HTML code on your Wix policy page to keep the information accurate and up to date.